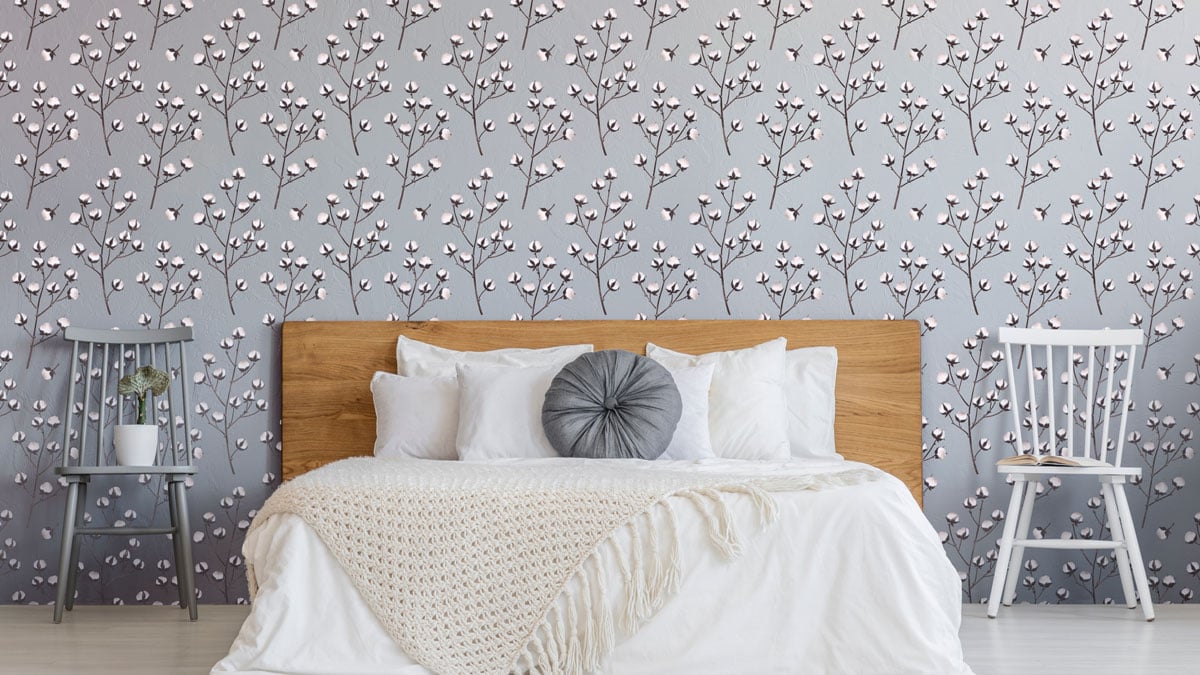
How A Cotton Stencil For Walls Looks Like Farmhouse Wallpaper!
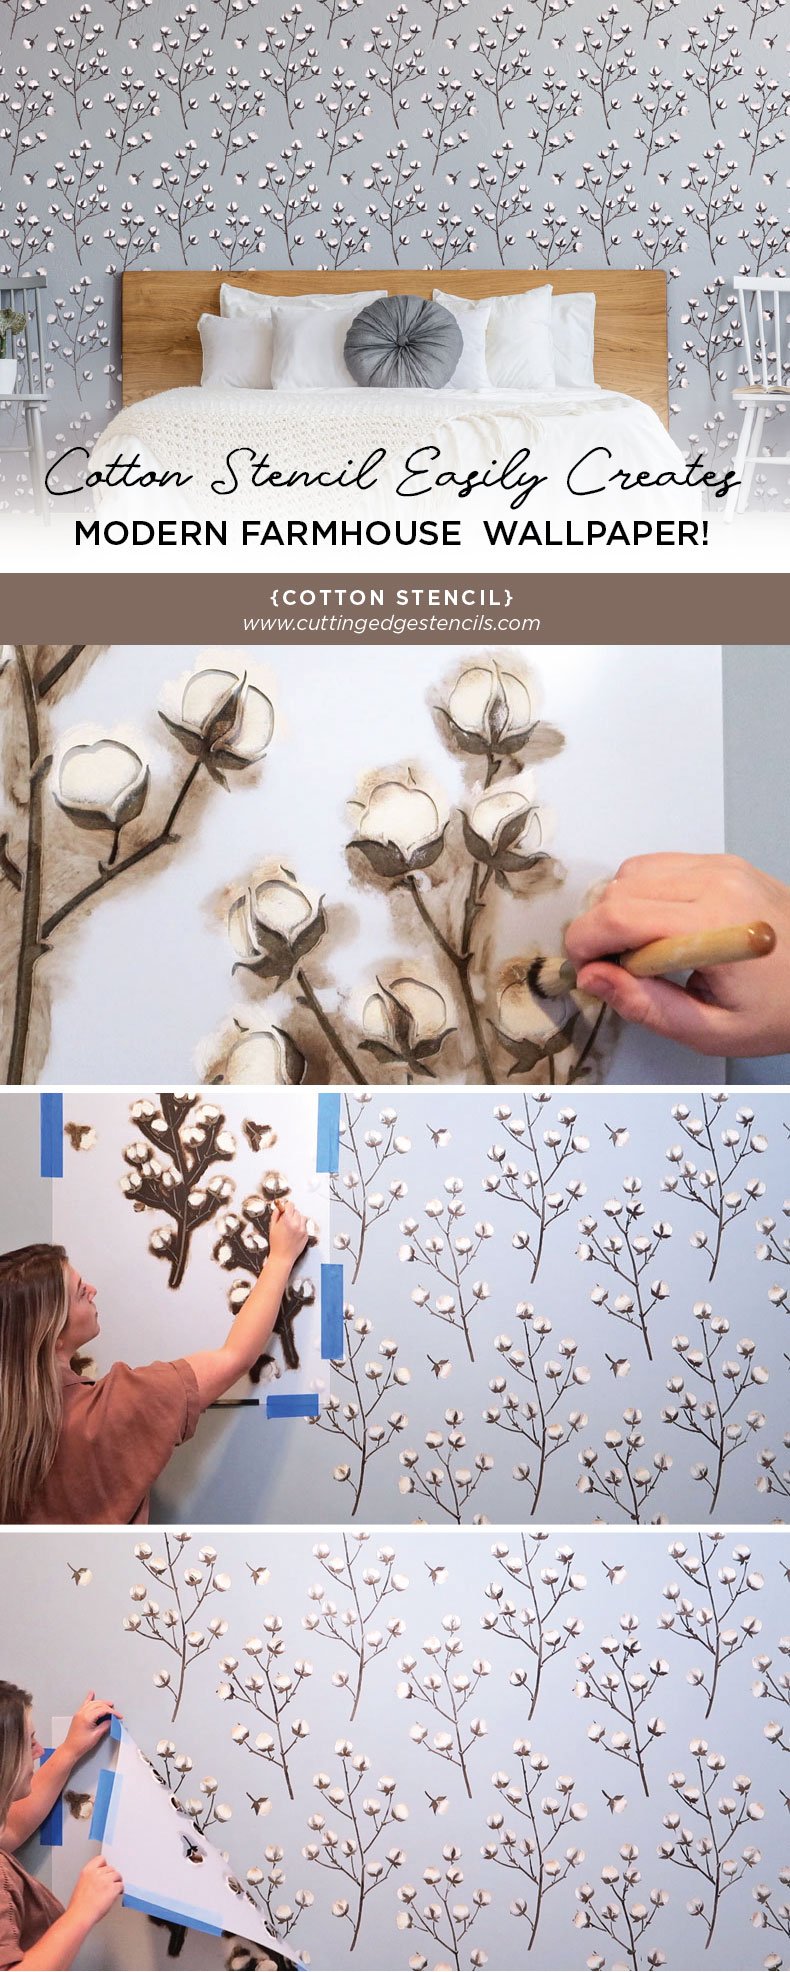
Welcome! Cutting Edge Stencils is no stranger when it comes to the farmhouse trend taking over Pinterest. In this blog, we will teach you how to stencil a wall that combines both delicate florals and neutral colors to create a modern farmhouse look. What we love about the simplistic Cotton Wall Stencil is that it can be used as an accent in a rustic style bedroom or whimsical statement in a country kitchen nook! This step-by-step tutorial will even teach you stenciling tricks you can use for other DIY projects. Let’s get started!
Materials Needed For Your Stencil Cotton Wall
- Cotton Stencil for Wall
- Special Delivery by Behr (wall base)
- Navajo White (flat) by Benjamin Moore
- Raw Umber Acrylic Paint by FolkArt
- Repositionable Spray Adhesive
- Clip-On Stencil Level
- Blue Painter’s Tape
- 1/2″ Professional Stencil Brush
- 3/4″ Professional Stencil Brush
- Paper Plate
- Paper Towel
Steps To Take Before Stenciling A Wall
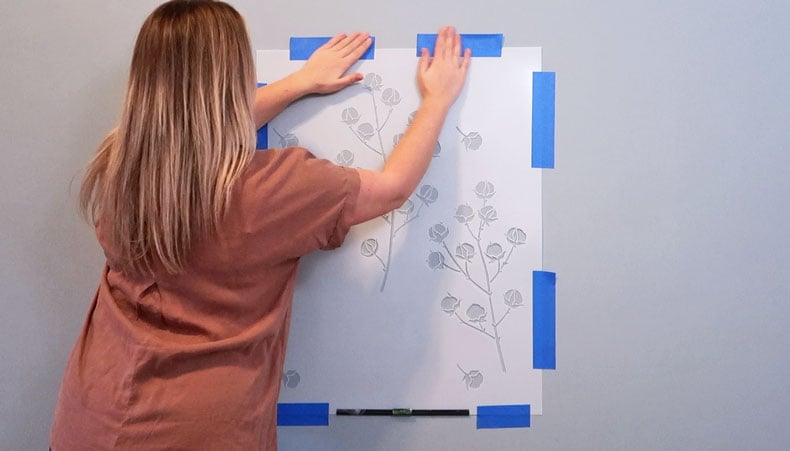
Before stenciling a wall, apply repostionable spray adhesive to the back of your wall stencil. Repositionable spray adhesive is perfect for wall stencils because it helps the stencil stick to the wall and reduce your chances of paint seepage under the wall stencil. Attach a Clip-On Stencil Level to the bottom of your wall stencil. This must-have Clip-On Stencil Level is the most convenient tool in the stencil industry! Hang your wall stencil at the top of your wall or aright under your crown molding with low-tack blue painter’s tape and begin!
How To Properly Add Paint To Your Stencil Brush
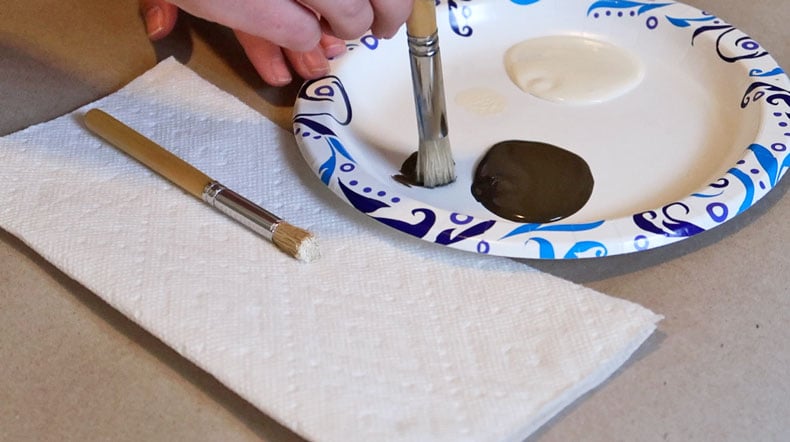
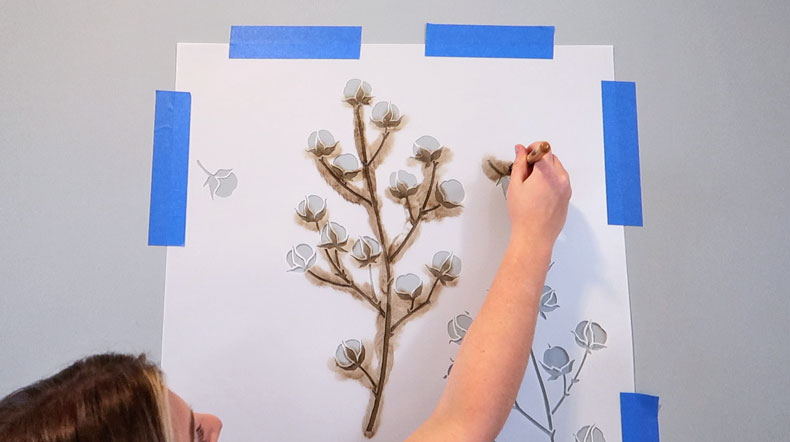
We are only using two paint colors for this detailed floral cotton stenciled accent wall! For the stems and shading, we are going to use FolkArt’s Raw Umber. Pour Raw Umber onto a paper plate and dip the tip of a ½” brush for stenciling into the Raw Umber. Pallet the brush on plate, working the paint into the bristles. You are going to do the same with Navajo White, except with a ¾” brush for stenciling.
Step One
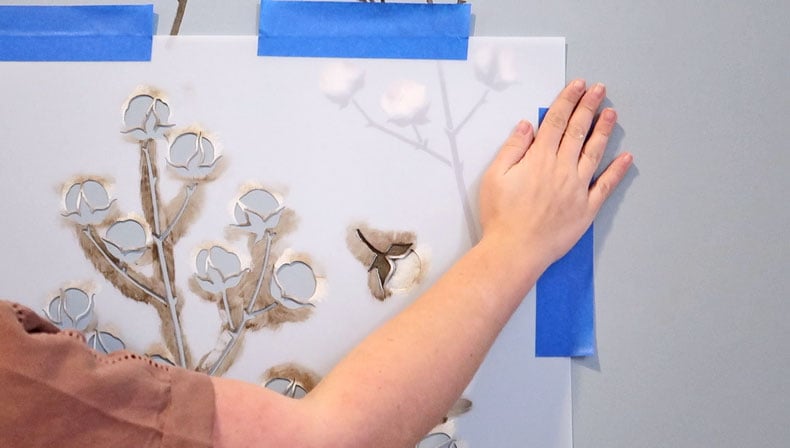
First, take your brush for stenciling and pounce Raw Umber over all the stems. Towards the cotton boll, the openings are slightly closer together and it might seem difficult to keep the paint from overflowing onto the cotton. Don’t worry about it! Floral wall stencils can have “imperfections,” like a little paint seepage and paint getting onto an unintended area. Unlike geometric wall stencils, nature has a more organic aspect to it and it only makes the design look better!
Step Two
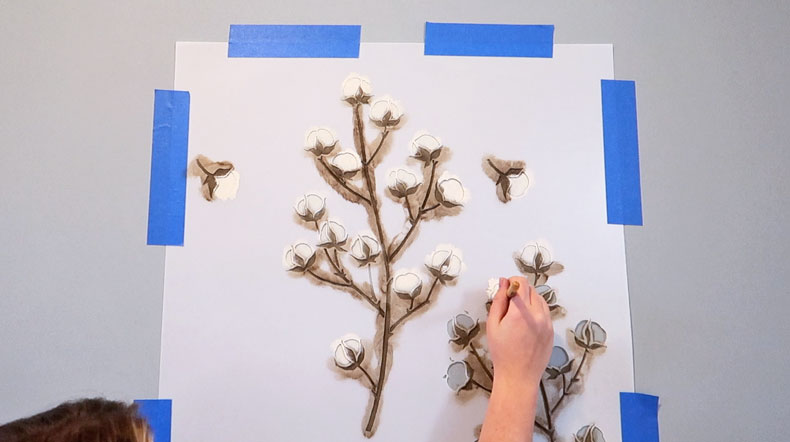
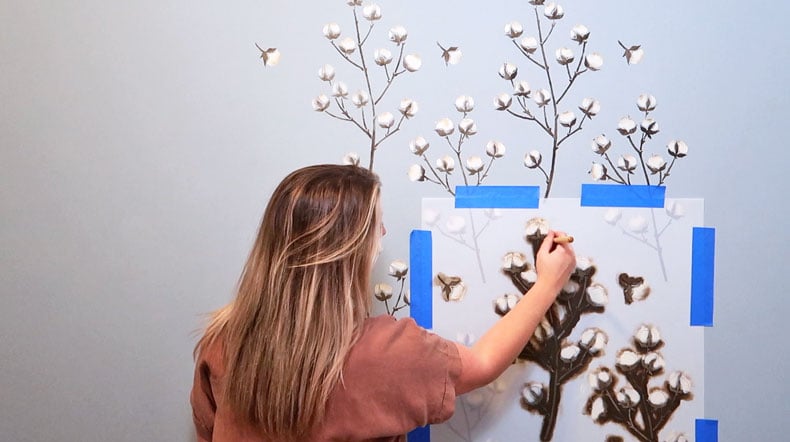
Next, pounce Navajo White over the cotton boll. Just like the stems, it’s totally fine if you get a little bit of paint flowing over onto the stem area of the floral wall stencil! It will only give your cotton wall stencil more character!
Step Three
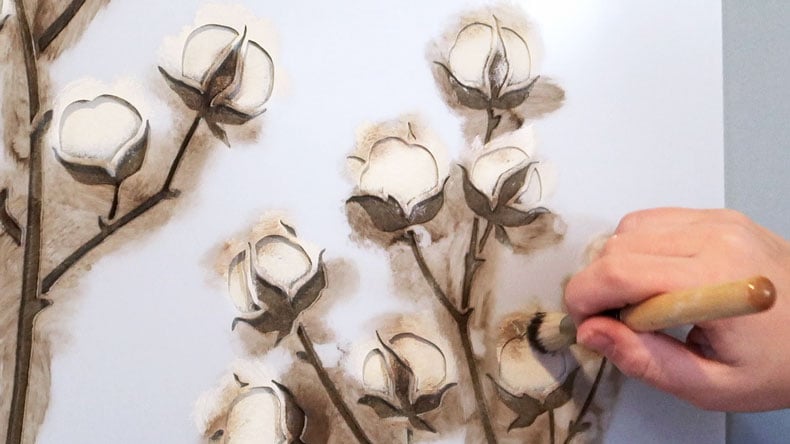
Now it’s time for the fun part, drying brushing the details! Dry brushing is a popular painting technique that requires very little paint on your stencil brush. Very lightly, swirl your ½” stencil brush with a little bit of Raw Umber on it over the tops and edges of the cotton boll.
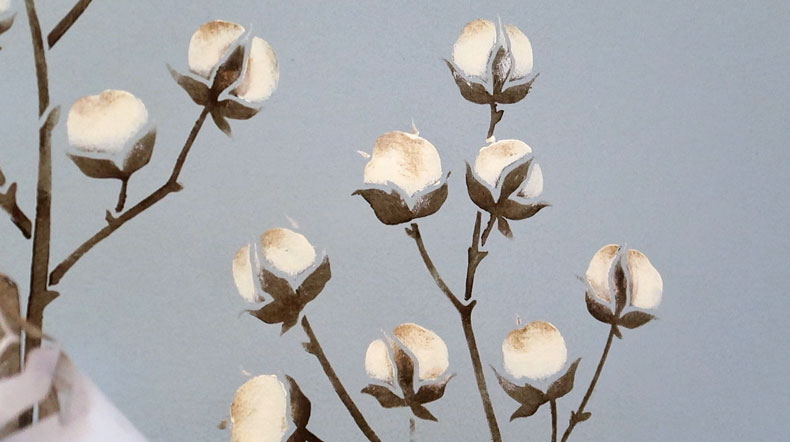
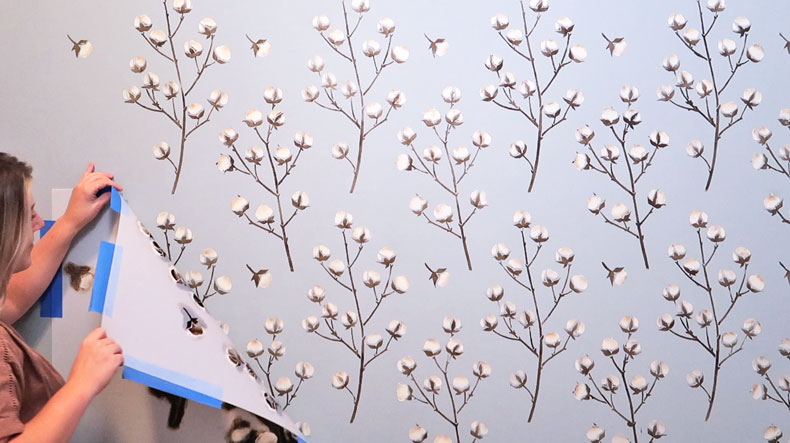
Peel your cotton wall stencil off the wall and watch a realistic cotton plant come to life before your very eyes!
Step 4
All of our stencils for walls are designed with a registration system so your pattern can easily be repeated. Acrylic and flat paint dry very quickly, so after waiting 1-2 minutes to dry, realign your floral wall stencil pattern with the built-in registration marks!
Multicolor stenciling is often viewed as “too tedious” but we can’t help but disagree! Focusing your energy into a detailed wall stenciling DIY project can be meditative and satisfying to the soul! Depending on the size of the wall, take a day or two to relax and paint away!
Once you peel back that last wall stencil pattern, take a step back and admire your masterpiece! Great things take time and patience and it is definitely worth it in the end!
Can’t get enough of Cutting Edge Stencils:
- Check out our Cutting Edge Stencils Facebook Page to see our beautiful customer photos and interact with the people who created them!
- Buy our Tile Stencils or Wall Stencils for your next stencil project, and browse our other wonderful stencil designs
- Follow us on Instagram and Pinterest and share your designs using #CuttingEdgeStencils. We love seeing your projects!
- Feeling inspired? Check out our other Blog posts for more inspo and stencil designs!
Thanks for reading and happy stenciling!