


Love it!
"Love your stencils. So beautiful and lovely to work with. Finished product is gorgeous."

Cart
Your cart is empty


Estimated Arrival: 3-5 business days
Free shipping over $100
Highest Quality Stencils
Safe checkout
Made in USA
Free shipping over $100
Highest Quality Stencils
Safe checkout
Made in USA


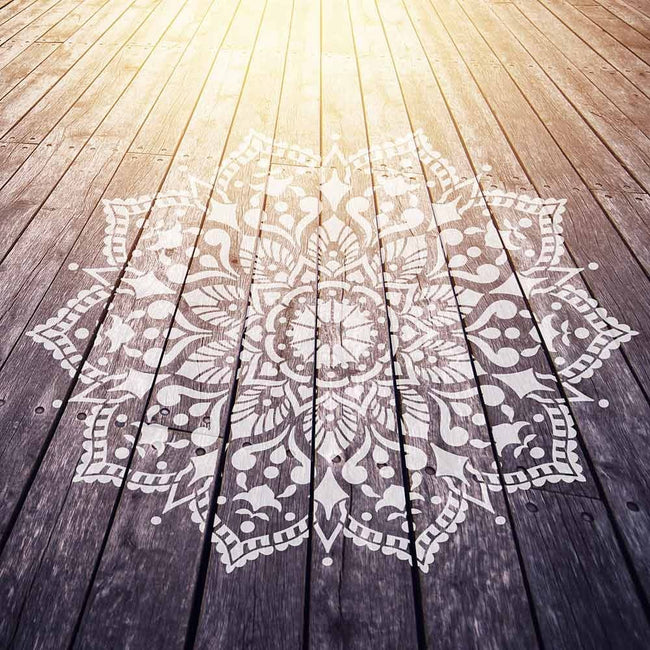
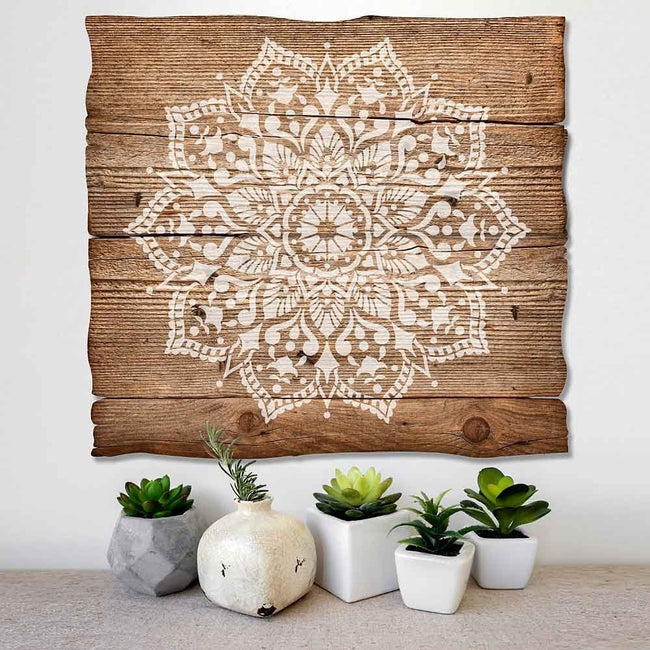
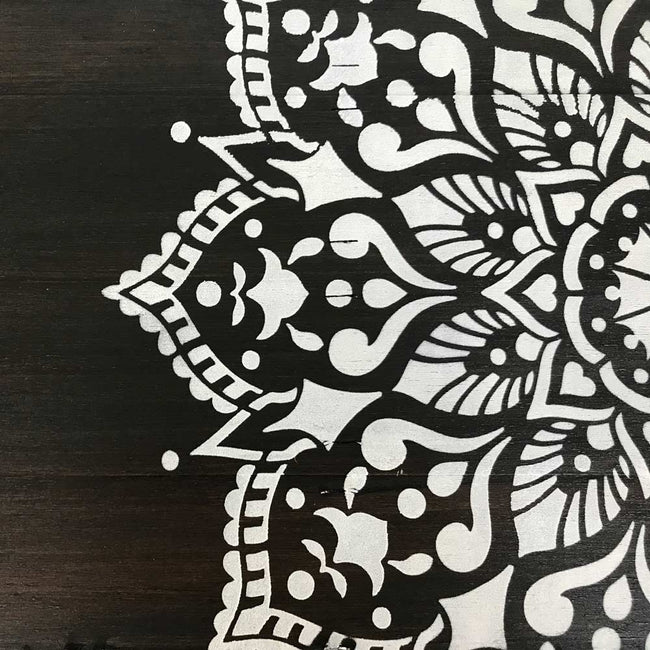
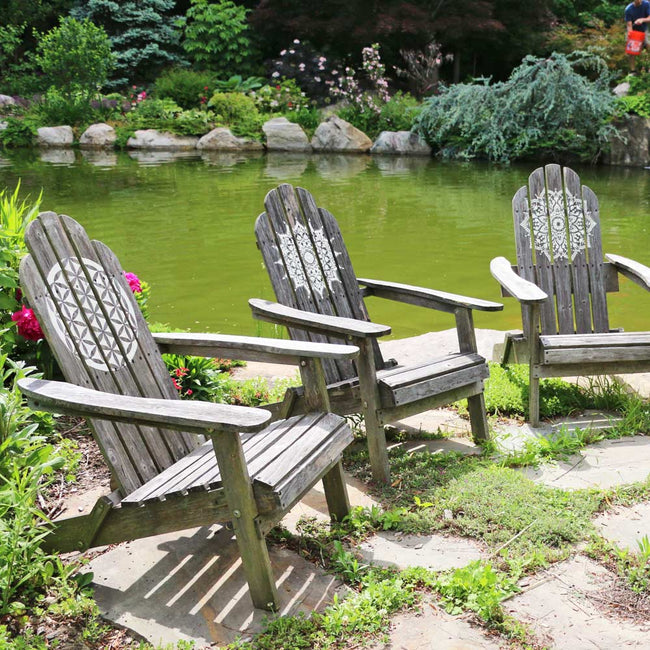
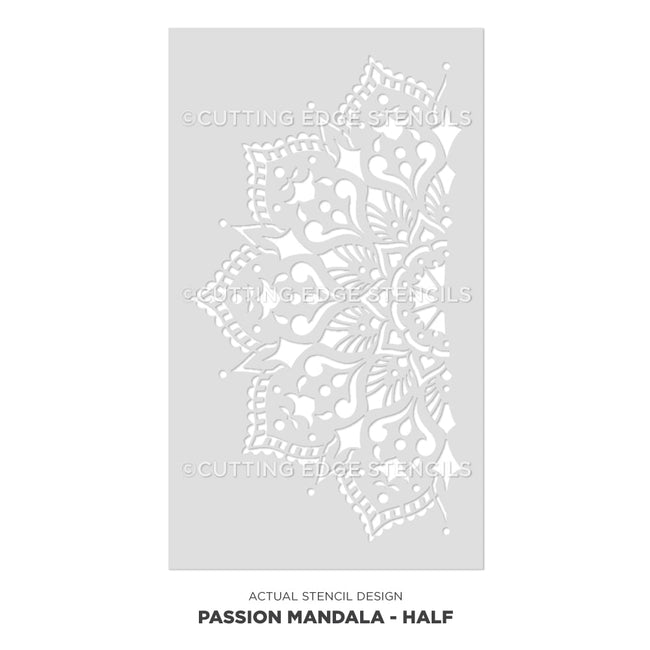
We are passionate about our new Passion Mandala stencil! Intricate mandala designs are so easy to use, even for the first time stenciler, so don't be intimidated! Just watch our How to stencil videos featuring various super easy mandala stenciled projects. Mandalas look great on furniture, floors, decks and patios, canvasses and reclaimed wood as wall art. So much more creative than mandala decals!
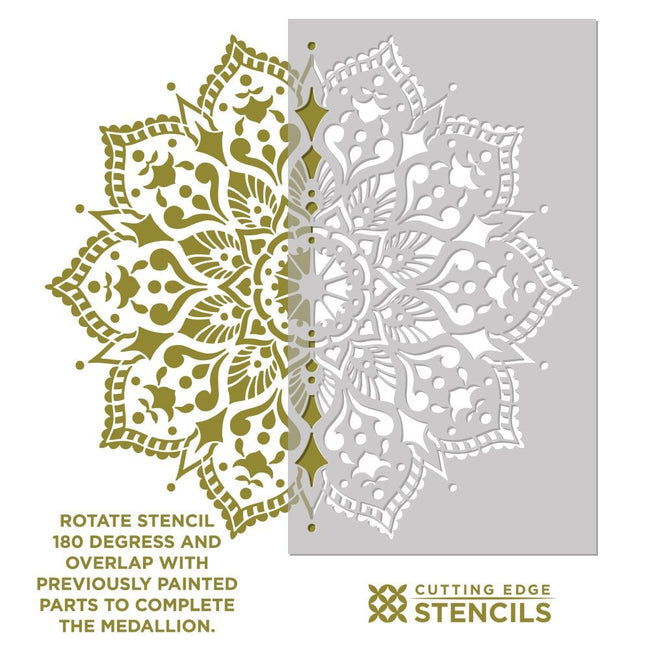
For the mandalas that are 18" to 30", you will be receiving a full medallion. For the 36" and 44" mandalas, you will receive half of the design and to complete the medallion, pick up the stencil after completing one side, flip it and line up the registration marks (see photo above), tape it and do it again.
This medallion stencil is so easy to use, virtually anyone can do it. Simply tape it to the wall using BLUE painter's tape, then load your foam roller with the paint of your choice (latex or acrylic). Get rid of excess paint by rolling the foam roller over a folded paper towel. Then, just roll it over the stencil applying medium pressure for an instant fabulous result! Don't press on the roller too hard otherwise you might get some paint seepage under the stencil.
Want to learn the easiest stenciling technique? Here are the detailed illustrated Roller Stenciling Tips.
This is an easy design to stencil with a dense foam roller. For expert stenciling tips, please watch our How-to stencil videos! You'll find them extremely helpful for your stenciling project. Even beginners get great results!
Although most of our stencils do not require the use of spray adhesive, if your walls have a texture to them, it might be a good idea to use spray adhesive to help minimize paint seepage (Elmer's spray adhesive seems to be the best). Make sure you shake the can well and lightly mist (not drench) the stencil, and let it dry for a moment before positioning it on the wall. This step will prevent the adhesive residue transferring to the wall. You'll need to re-mist the stencil after a few repeats. Note: you will still need to hold the stencil in place with a few pieces of blue painters tape! Adhesive by itself is not enough to hold the stencil on the wall. Clean-up tip:Spray the stencil with Simple Green to help to remove adhesive residue and let it sit for a while before cleaning with soap and water. Please note that it is virtually impossible to get rid of all adhesive residue. That's why we personally prefer not to use it and just stick with painter's tape!
Stenciling on rough or textured walls may contribute to increased paint bleed. For more information on stenciling on textured walls, see our F.A.Q. section.
About seepage and imperfections: Even with a proper loaded roller and correct technique you might get some minor paint seepage here and there. In most cases it's not noticeable, especially from a couple of feet away and it can be easily touched up with a small brush. Don't forget that you're creating a "hand-painted wall finish". A few imperfections and some paint seepage here and there are natural and inevitable for this type of work. To avoid seepage, use spray adhesive and less paint on your roller and brush.
Did you know you can stencil your own fabric and use it for curtains, tablecloths, pillows, etc.? When stenciling on fabric, please use stencil adhesive to ensure good results. First, tape your ironed fabric to the surface so it doesn't move around while you stencil. You'll get better results with stencil brushes, but sometimes roller can work too, depending on your fabric. Add some textile medium ( sold in craft stores) to your acrylic paint. You can also get a specially formulated fabric paint, but, frankly, good craft acrylic paint with a dollop of textile medium mixed in works just as well, and costs way less! :) Let the stenciled image dry completely, 24 hours is best, then heat-set it by ironing the fabric for about 20-30 seconds on a LOW setting through the piece of cloth. Heat-setting will cure the paint and will prevent it from being washed off in the washing machine. Always experiment with a sample of your fabric first to ensure good results. We have stenciled on silk, cotton, linen and even sheer fabrics with great results. It's always better if your fabric doesn't have too much texture.
All of our stencils are made of thick, sturdy but flexible 12 mil clear plastic, reusable, easy to clean and stenciler-friendly! In our 20+ years of professional stenciling this material has proven to be far superior than any other material we used, including the industry standard 8 mil mylar. We are certain you'll notice the difference and will love working with it, just like all the folks who already bought our stencils.
USPS can deliver most domestic packages within 3-5 business days (often sooner). For international packages, the delivery time is appr. 7-14 days. For Expedited shipping please select the options at the Checkout. Allow 1 business day for processing of all expedited orders.
30-DAY RETURNS
You can return your unused items within 30 days with no restocking fee. Questions? Please see our full Shipping and Returns Policy.
If you require custom size stencils, please contact us.
Choose options
Estimated Arrival: 3-5 business days
Free shipping over $100
Highest Quality Stencils
Safe checkout
Made in USA
Free shipping over $100
Highest Quality Stencils
Safe checkout
Made in USA
We are passionate about our new Passion Mandala stencil! Intricate mandala designs are so easy to use, even for the first time stenciler, so don't be intimidated! Just watch our How to stencil videos featuring various super easy mandala stenciled projects. Mandalas look great on furniture, floors, decks and patios, canvasses and reclaimed wood as wall art. So much more creative than mandala decals!
For the mandalas that are 18" to 30", you will be receiving a full medallion. For the 36" and 44" mandalas, you will receive half of the design and to complete the medallion, pick up the stencil after completing one side, flip it and line up the registration marks (see photo above), tape it and do it again.
This medallion stencil is so easy to use, virtually anyone can do it. Simply tape it to the wall using BLUE painter's tape, then load your foam roller with the paint of your choice (latex or acrylic). Get rid of excess paint by rolling the foam roller over a folded paper towel. Then, just roll it over the stencil applying medium pressure for an instant fabulous result! Don't press on the roller too hard otherwise you might get some paint seepage under the stencil.
Want to learn the easiest stenciling technique? Here are the detailed illustrated Roller Stenciling Tips.
This is an easy design to stencil with a dense foam roller. For expert stenciling tips, please watch our How-to stencil videos! You'll find them extremely helpful for your stenciling project. Even beginners get great results!
Although most of our stencils do not require the use of spray adhesive, if your walls have a texture to them, it might be a good idea to use spray adhesive to help minimize paint seepage (Elmer's spray adhesive seems to be the best). Make sure you shake the can well and lightly mist (not drench) the stencil, and let it dry for a moment before positioning it on the wall. This step will prevent the adhesive residue transferring to the wall. You'll need to re-mist the stencil after a few repeats. Note: you will still need to hold the stencil in place with a few pieces of blue painters tape! Adhesive by itself is not enough to hold the stencil on the wall. Clean-up tip:Spray the stencil with Simple Green to help to remove adhesive residue and let it sit for a while before cleaning with soap and water. Please note that it is virtually impossible to get rid of all adhesive residue. That's why we personally prefer not to use it and just stick with painter's tape!
Stenciling on rough or textured walls may contribute to increased paint bleed. For more information on stenciling on textured walls, see our F.A.Q. section.
About seepage and imperfections: Even with a proper loaded roller and correct technique you might get some minor paint seepage here and there. In most cases it's not noticeable, especially from a couple of feet away and it can be easily touched up with a small brush. Don't forget that you're creating a "hand-painted wall finish". A few imperfections and some paint seepage here and there are natural and inevitable for this type of work. To avoid seepage, use spray adhesive and less paint on your roller and brush.
Did you know you can stencil your own fabric and use it for curtains, tablecloths, pillows, etc.? When stenciling on fabric, please use stencil adhesive to ensure good results. First, tape your ironed fabric to the surface so it doesn't move around while you stencil. You'll get better results with stencil brushes, but sometimes roller can work too, depending on your fabric. Add some textile medium ( sold in craft stores) to your acrylic paint. You can also get a specially formulated fabric paint, but, frankly, good craft acrylic paint with a dollop of textile medium mixed in works just as well, and costs way less! :) Let the stenciled image dry completely, 24 hours is best, then heat-set it by ironing the fabric for about 20-30 seconds on a LOW setting through the piece of cloth. Heat-setting will cure the paint and will prevent it from being washed off in the washing machine. Always experiment with a sample of your fabric first to ensure good results. We have stenciled on silk, cotton, linen and even sheer fabrics with great results. It's always better if your fabric doesn't have too much texture.
All of our stencils are made of thick, sturdy but flexible 12 mil clear plastic, reusable, easy to clean and stenciler-friendly! In our 20+ years of professional stenciling this material has proven to be far superior than any other material we used, including the industry standard 8 mil mylar. We are certain you'll notice the difference and will love working with it, just like all the folks who already bought our stencils.
USPS can deliver most domestic packages within 3-5 business days (often sooner). For international packages, the delivery time is appr. 7-14 days. For Expedited shipping please select the options at the Checkout. Allow 1 business day for processing of all expedited orders.
30-DAY RETURNS
You can return your unused items within 30 days with no restocking fee. Questions? Please see our full Shipping and Returns Policy.
If you require custom size stencils, please contact us.
Overall rating: 5.0 / 5 from 23 reviews.
Review topics: [].
"Love your stencils. So beautiful and lovely to work with. Finished product is gorgeous."
"Just got it, tanks 😍"
"The stencil was easy to use, and turned out beautifully. It was a large one, and it was easy to lay flat, and paint."
"We are waiting to refinish a floor before we use this stencil and I cannot wait! The mandala will be the centerpiece of a painted “rug”. I’ve been stenciling for 40 years and am confident that it will turn out great. Will post photos upon completion. Thank you for all the wonderful options you offer, will definitively be purchasing again!"
"Beautiful"
"First let me say, as so many others have, that the quality of the stencil is excellent, which goes a *long* way towards getting a good result. I’d also like to offer up how we did our project, in case anyone is nervous about how to go about doing this. We wanted to repurpose a small, nonfunctional room into an open space, yoga-type room. We had the room professionally painted, and used painters tape (criss-crossed) to determine the size and rough location of the mandala. Although the mandala instructions on this site show using a firm roller to apply the paint, I wanted to use a stencil brush to achieve a softer, mottled look. Cutting Edge responded to my questions quickly with the recommendation to use a 1 1/2 - 2” stencil brush (as opposed to the very small one I already owned). Michael’s only had a 1 3/4” chalk brush — have no idea what it’s real function is, but it looked like it might work. It is not a nice, good quality brush, but it did get the job done (albeit losing bristles along the way). The website instructions also said that repositionable spray was not necessary, but might be helpful. I think spray might not be necessary if applying paint with a roller, but if swirling paint on with a brush, securing all the narrow little stencil points firmly to the wall is a must to minimize seepage and prevent those narrow bits from bending back. We used a level + eyeballing to tack the stencil to the wall & then used painters tape as back-up for the tacky spray. My 30” mandala used less than 1 small tube of Folk Art brand paint. A little squirt on a ceramic plate, dip the brush, and then off-load the paint on a paper towel to take off almost all the paint you just put on the brush. Start swirling the brush with a light hand because you did not get off as much paint as you thought. Blend the paint in, in a swirling motion, so there are lighter & darker areas. Don’t fret, it will all come together in the end & look great. When you are done look it over one last time for spots that are *too* light or that you might have missed, but don’t over work it. The actual process of stenciling my 30” mandala onto the wall took less than 1/2 hr. I waited about a half hour before taking the stencil off & it looked just as good as we’d hoped. We love it!"
"Great quality stencil!! Thank you for the fast shipping and pretty design choices for my stencil."
"I was anxious about stenciling on my wall but this was a piece of cake. It went on easily. The only problem I had was picking suitable colors—and even that worked out. I recommend the Passion Mandala highly. Thanks!"
"Very easy to use and high quality."
"Beautiful stencil easy to use and clear directions."

Become a Cutting Edge Stencils insider! Get exclusive promotions, new product launches and sales directly to your inbox!