Easy Decorative Pillow Tutorial & A Giveaway
DIY Throw Pillows Using the Oasis Paint-A-Pillow Kit
Happy Friday, my crafting friends! Getting a new sofa can be a big occasion. There can be so much excitement around choosing a piece of new furniture, especially a sofa, and having it delivered to the space. Unfortunately that gorgeous looking sofa that you fell madly in love with probably comes with stock pillows. No biggie!
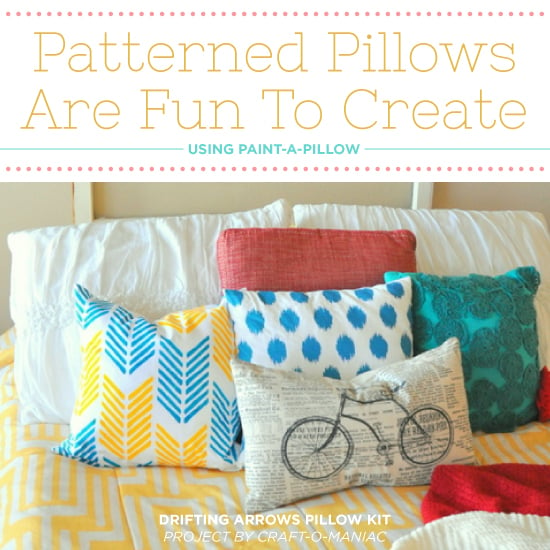
Paint-A-Pillow is the perfect solution to your stock pillow problem. Simply pick your pattern, fabric paint color, and craft your own DIY accent pillow. Let's take a look at how one of our DIY bloggers painted new throw pillows for her new sofa.

We'd like to welcome back Amy, the decorating guru behind the blog
Always Never Done. Amy was so excited to order a new couch for the living room since she's normally a DIY/thrifty living kind of gal. Along with the new couch came two stock pillows that didn't match her decor. So you can understand why Amy was excited to give Paint-A-Pillow a try when we reached out to her. Amy explored the Paint-A-Pillow website and selected the popular geometric pattern, the
Oasis Paint-A-Pillow Kit. She also purchased several extra Jacquard fabric paints and small square studs to embellish her pillow. Here is Amy's painted accent pillow:

We love it! Now let's talk about how you could easily recreate this pretty pillow cover. Oh, and don't miss the Paint-A-Pillow giveaway that
Always Never Done is hosting.
Amy was excited when her kit arrived in the mail. She commented, "It comes complete with everything you need to create your own customized pillow. "

Amy decided to stencil the pattern in three different colors. She purchased the neutral gray, white, and navy blue paint. She started the project by painting the neutral gray with a stencil brush.

**If you're recreating this at home, be careful not to overload the brush with paint. Brush off the excess paint onto a folded paper towel until the brush appears to be almost dry. The key to stenciling is using as little paint as possible. Too much paint will cause the design to bleed and smudge.

Once the entire pillow cover was painted, Amy peeled back the metal tabs holding the stencil in place and cleaned off the stencil. These stencils are reusable and can be used for other projects.

Now Amy was ready for the fun part, embellishing! To complete her accent pillow, she chose to add
small square studs. Amy simply pushed the stud through the fabric.

Then used a pencil tip to close the prongs.

Adding the studs was as easy as that!

And that's how she did it, my crafty friends! Amy had this to say about her craft, "Now I have pillows for my lovely new sofa that match the rest of my décor and I made them! I am so very proud of them because they look like I bought them that way. Don’t you agree?" We totally agree!


Amy loved creating her accent pillow so much that she's now giving away a free pillow kit on her blog, so go
enter!
Tell us: Do you need new accent pillows for your sofa? Leave us a comment below!
Looking for more Paint-A-Pillow fun?
- Shop our Paint-A-Pillow kits and find the perfect design for your home!
- Follow us on Pinterest to see awesome inspirational photos!
- Have you completed a pillow project? Come share it on Facebook!
Thanks for reading, and happy stenciling!
Michelle and the Paint-A-Pillow Team
 We'd like to welcome back Amy, the decorating guru behind the blog Always Never Done. Amy was so excited to order a new couch for the living room since she's normally a DIY/thrifty living kind of gal. Along with the new couch came two stock pillows that didn't match her decor. So you can understand why Amy was excited to give Paint-A-Pillow a try when we reached out to her. Amy explored the Paint-A-Pillow website and selected the popular geometric pattern, the Oasis Paint-A-Pillow Kit. She also purchased several extra Jacquard fabric paints and small square studs to embellish her pillow. Here is Amy's painted accent pillow:
 We love it! Now let's talk about how you could easily recreate this pretty pillow cover. Oh, and don't miss the Paint-A-Pillow giveaway that Always Never Done is hosting.
Amy was excited when her kit arrived in the mail. She commented, "It comes complete with everything you need to create your own customized pillow. "
 Amy decided to stencil the pattern in three different colors. She purchased the neutral gray, white, and navy blue paint. She started the project by painting the neutral gray with a stencil brush.
 **If you're recreating this at home, be careful not to overload the brush with paint. Brush off the excess paint onto a folded paper towel until the brush appears to be almost dry. The key to stenciling is using as little paint as possible. Too much paint will cause the design to bleed and smudge.
 Once the entire pillow cover was painted, Amy peeled back the metal tabs holding the stencil in place and cleaned off the stencil. These stencils are reusable and can be used for other projects.
 Now Amy was ready for the fun part, embellishing! To complete her accent pillow, she chose to add small square studs. Amy simply pushed the stud through the fabric.
 Then used a pencil tip to close the prongs.
 Adding the studs was as easy as that!
 And that's how she did it, my crafty friends! Amy had this to say about her craft, "Now I have pillows for my lovely new sofa that match the rest of my décor and I made them! I am so very proud of them because they look like I bought them that way. Don’t you agree?" We totally agree!

 Amy loved creating her accent pillow so much that she's now giving away a free pillow kit on her blog, so go enter!


