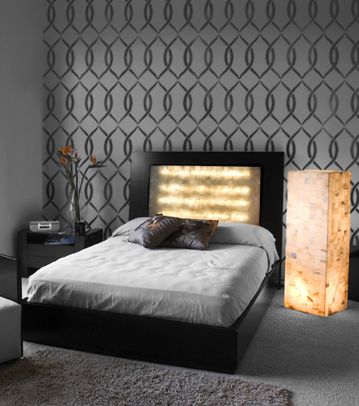
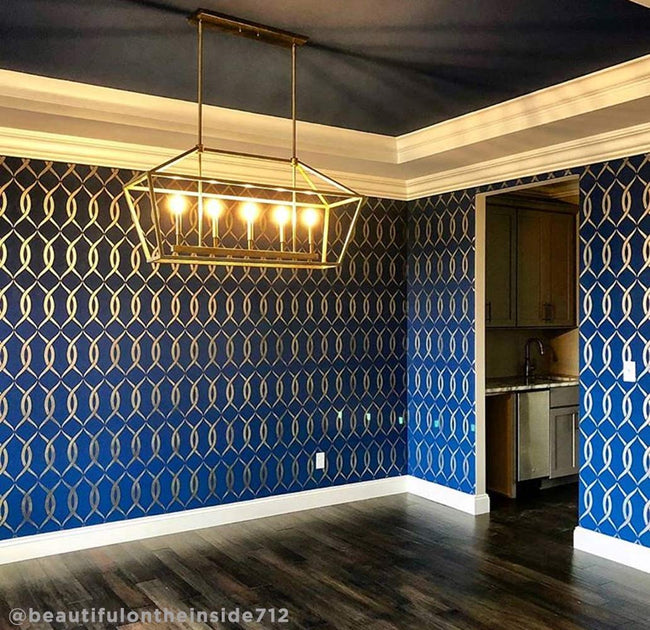
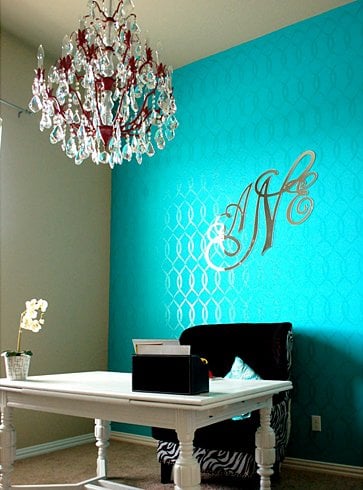
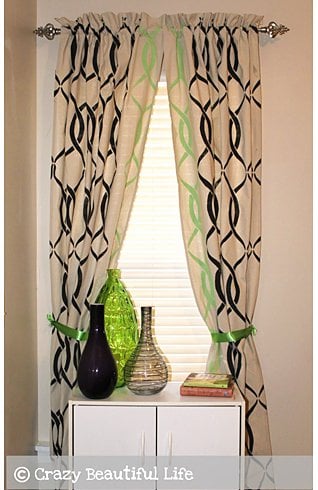
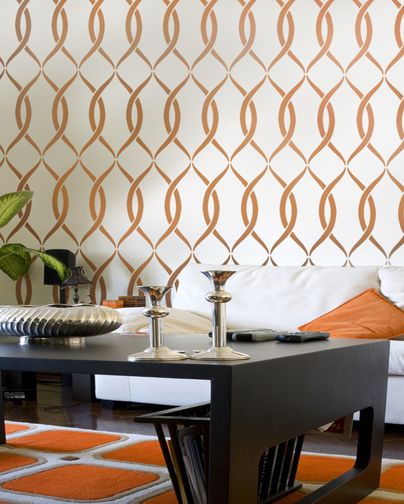
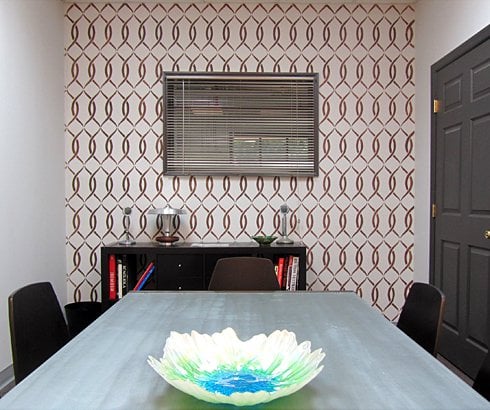
Very elegant and classy allover stencil: "Entwined". This sophisticated stencil design looks great in contemporary or classical settings. Try it for your next DIY wall decorating project! This allover stencil will look stunning on your accent wall.
This stencil comes with an additional FREE Top part: the upper part of the design cut as a smaller separate stencil. It makes it easy to fill the gaps close to the ceiling line. To see how to use Top part stencils, click here for Illustrated instructions: Using Top Edge Stencils
Stenciling on rough or textured walls may contribute to increased paint bleed. For more information on stenciling on textured walls, see our F.A.Q. section.
This is an "outlining" stencil, meaning you're outlining the pattern as opposed to filling it. Keep this in mind when choosing your stenciling color: this will be the color of the pattern's outlines. Refer to Actual stencil picture (the last black and white picture) to see where the paint goes.
While prior stenciling experience is helpful for allover patterns, even beginner stencilers get great results! This design is recommended for feature/accent wall and also works for furniture and fabric embellishment.
Want to learn how to stencil a damask or allover pattern? Here are the detailed illustrated step-by-step Damask/Allover Stenciling Tips.
And make sure you watch our short step-by-step Video Tutorials! You'll find them extremely helpful for your stenciling project. Even beginners get great results!
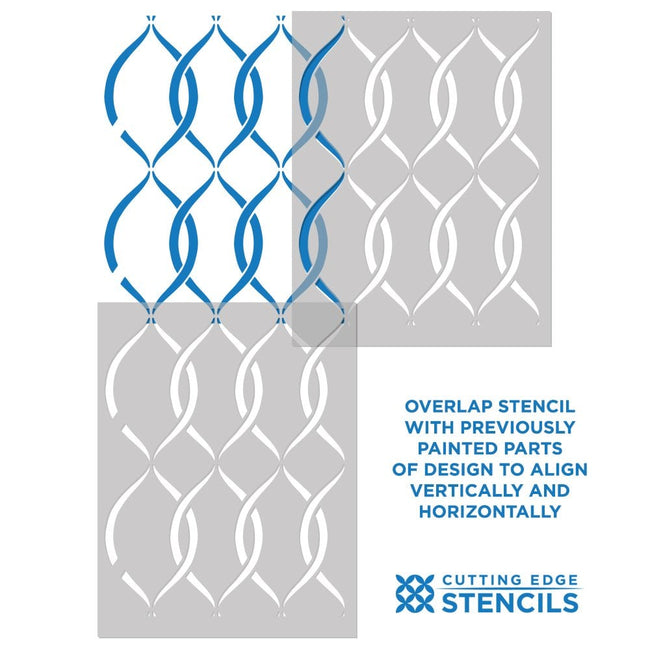
Stencil features an easy registration system, just use rows of the previously painted design to align the stencil, check for level and continue. This gives you a seamless "wallpaper" look. Don't worry about super perfect alignment: in the end your eye will never ever notice the discrepancy. We decorative pros "fudge" damasks and allover patterns all the time! The walls in most houses are often not straight, so some "fudging" while stenciling is very helpful and, in the end, not noticeable.
Try this stencil with our new Clip-on Stencil Level, (sold separately) and discover how easy it is to achieve perfectly level results without dealing with all those bulky heavy bubble levels and annoying laser levels.
Although usually it is not necessary to use spray adhesive with our stencils, for this crisp geometric pattern it is recommended. If you want to minimize paint seepage or are using high contrasting colors, adhesive is very helpful (Elmer's spray adhesive seems to be the best). Make sure you shake the can well and lightly mist (not drench) the stencil, and let it dry for a moment before positioning it on the wall. This step will prevent the adhesive residue transferring to the wall. You'll need to re-mist the stencil after a few repeats. Clean-up tip: Spray the stencil with Simple Green to help to remove adhesive residue.
About seepage and imperfections: Even with a proper loaded roller and correct technique you might get some minor paint seepage here and there. In most cases it's not noticeable, especially from a couple of feet away and it can be easily touched up with a small brush. Don't forget that you're creating a "hand-painted wall finish". A few imperfections and some paint seepage here and there are natural and inevitable for this type of work. To avoid seepage, use spray adhesive and less paint on your roller and brush.
Did you know you can stencil your own fabric and use it for curtains, tablecloths, pillows, etc.? When stenciling on fabric, please use stencil adhesive to ensure good results. First, tape your ironed fabric to the surface so it doesn't move around while you stencil. You'll get better results with stencil brushes, but sometimes roller can work too, depending on your fabric. Add some textile medium ( sold in craft stores) to your acrylic paint. You can also get a specially formulated fabric paint, but, frankly, good craft acrylic paint with a dollop of textile medium mixed in works just as well, and costs way less! :) Let the stenciled image dry completely, 24 hours is best, then heat-set it by ironing the fabric for about 20-30 seconds on a LOW setting through the piece of cloth. Heat-setting will cure the paint and will prevent it from being washed off in the washing machine. Always experiment with a sample of your fabric first to ensure good results. We have stenciled on silk, cotton, linen and even sheer fabrics with great results. It's always better if your fabric doesn't have too much texture.
All of our stencils are made of thick, sturdy but flexible 12 mil clear plastic, reusable, easy to clean and stenciler-friendly! In our 20+ years of professional stenciling this material has proven to be far superior than any other material we used, including the industry standard 8 mil mylar.
We are certain you'll notice the difference and will love working with it, just like all the folks who already bought our stencils.
Our stencils are made to last and with proper care and storage will serve you for a long time.