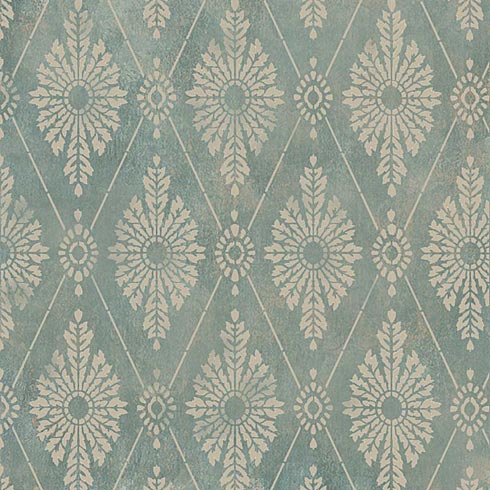
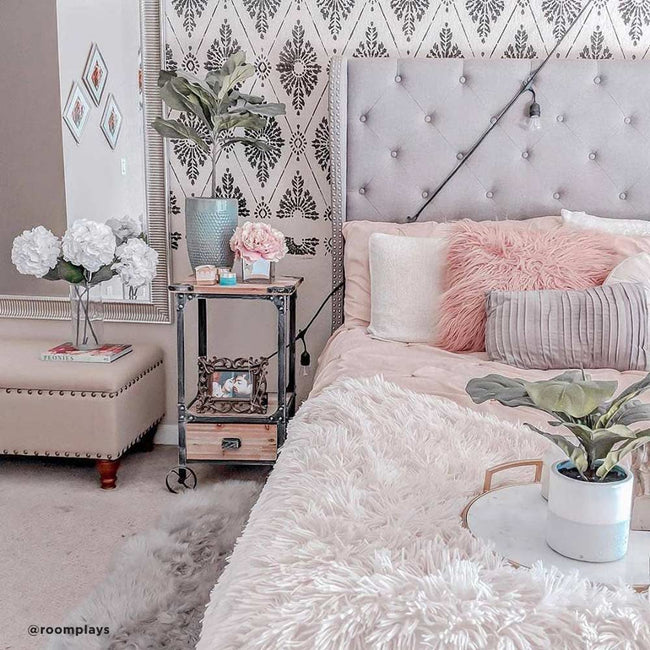
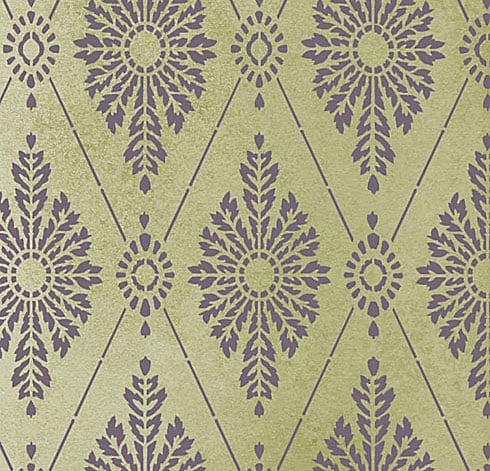
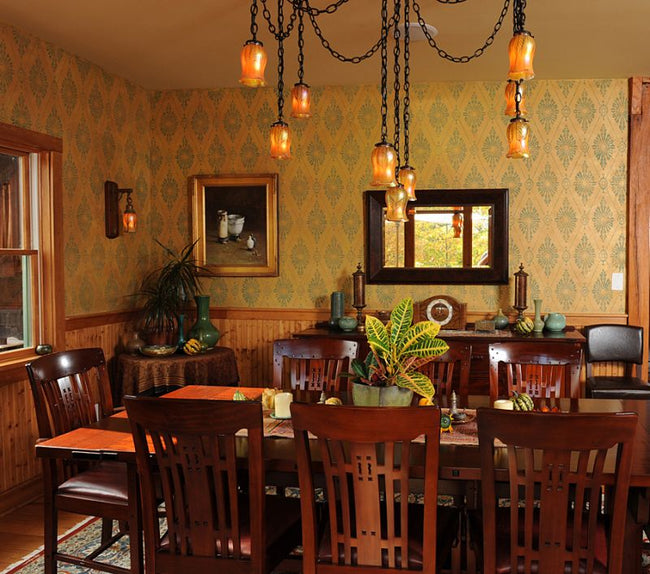
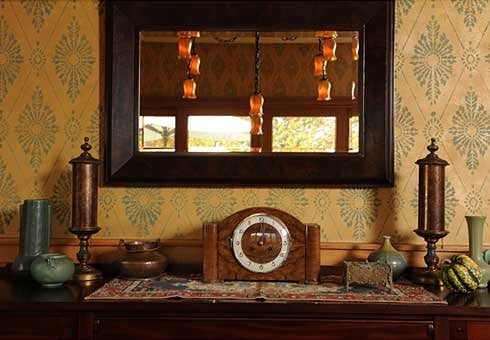
Here's our beautiful Diamond damask stencil pattern. You'll transform the ordinary room into a spectacular one with this beautiful stencil. Great design idea for dining rooms, bedrooms and hallways. This stencil looks great on an accent wall, especially in a dining room. Stencils are a great alternative to wallpaper; they save you lots of money and are easy and fun to use! Stencils can be used not only on walls, but also on fabrics, floors and furniture.
If you compare our stencil thickness, size, design quality and prices, you will be amazed at the value that Cutting Edge Stencils offer!
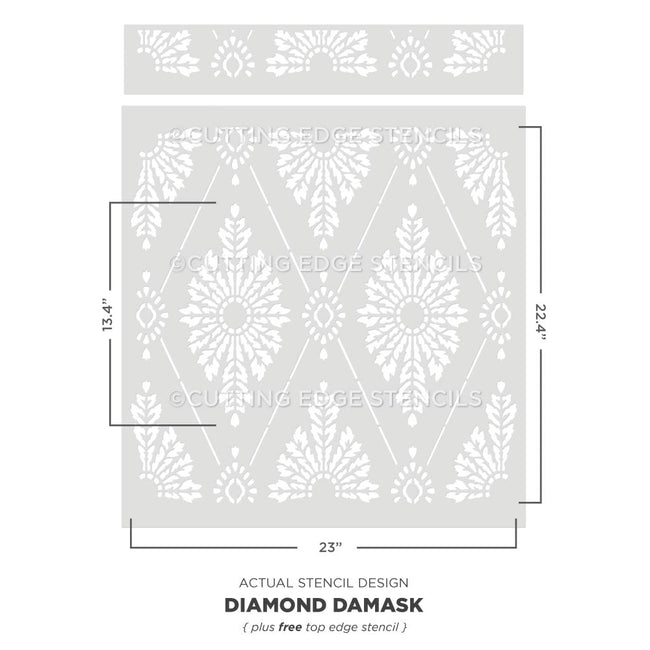
We even included a FREE TOP STENCIL: the top part of the design cut as a separate smaller stencil. It makes it easy to fill those gaps in the pattern close to the ceiling. To see how to use Top part stencils, click here for Illustrated instructions: Using Top Part Stencils
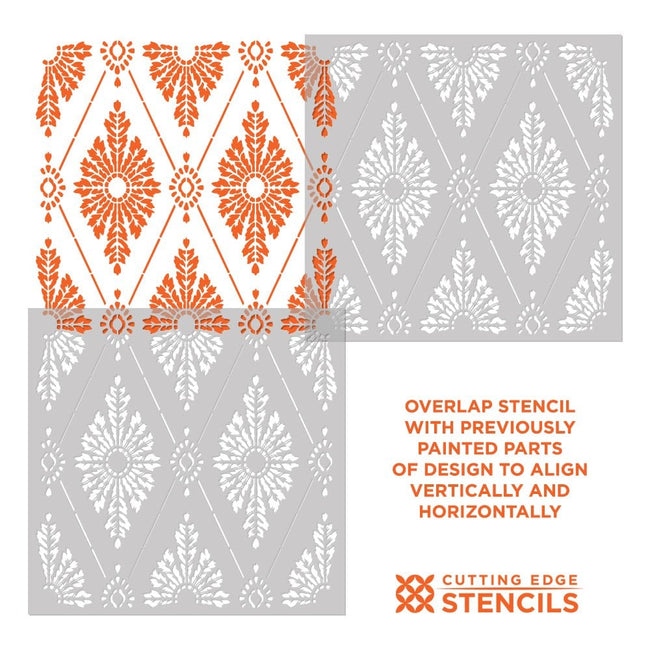
Stencil features an easy registration system, just use the parts of the design to align the stencil.Don't worry about super perfect alignment: in the end your eye will never ever notice if it's a little bit off. We decorative pros "fudge" allover patterns all the time! The walls in most houses are often not straight, so some "fudging" while stenciling helps a lot.
Stenciling on rough or textured walls may contribute to increased paint bleed. For more information on stenciling on textured walls, see our F.A.Q. section.
Want to learn how to stencil a damask or allover pattern? Here are the detailed illustrated step-by-step Damask/Allover Stenciling Tips.
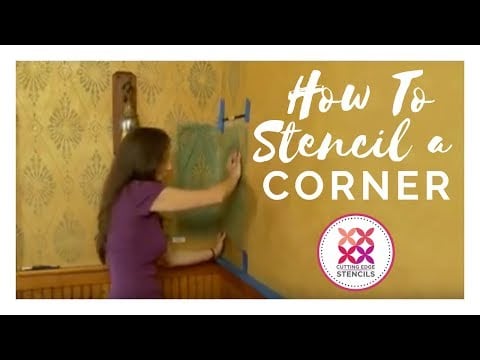
And make sure you watch our short step-by-step Video Tutorials! You'll find them extremely helpful for your stenciling project. Even beginners get great results!
Try this stencil with our new Clip-On Stencil Level, (sold separately) and discover how easy it is to achieve perfectly level results without dealing with all those bulky heavy bubble levels and annoying laser levels.
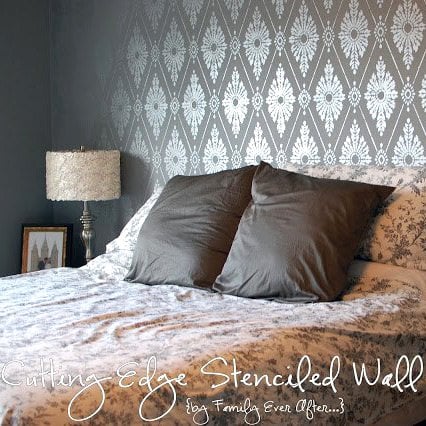
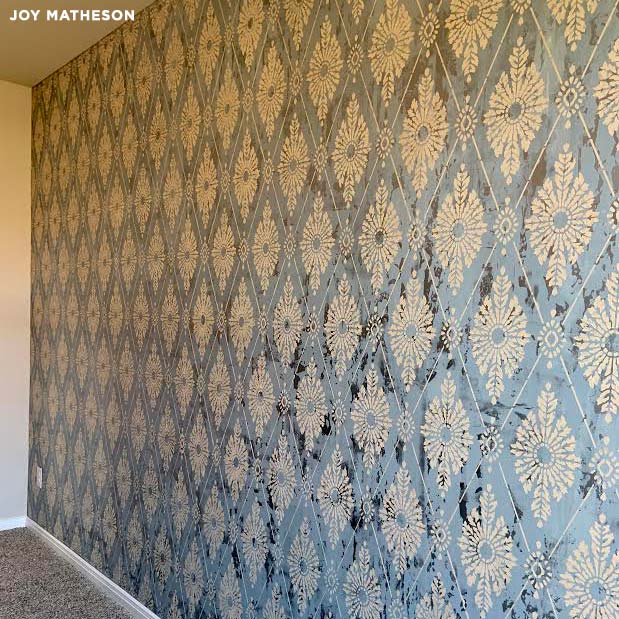
Take a look at pictures of a magnificent charcoal/metallic accent wall that our customer Stacy W. created using this stencil! It's hard to believe she never stenciled before.
Usually it is not necessary to use spray adhesive with our stencils. However, if you want very crisp edges or are using high contrasting colors, please use it (Elmer's spray adhesive seems to be the best). I personally prefer just to attach pieces of blue painter's tape to secure the stencil, but for beginners it may be helpful to mist a stencil with spray adhesive just to make sure you get great results.
About seepage and imperfections: Even with a proper loaded roller and correct technique you might get some minor paint seepage here and there. In most cases it's not noticeable, especially from a couple of feet away and it can be easily touched up with a small brush. Don't forget that you're creating a "hand-painted wall finish". A few imperfections and some paint seepage here and there are natural and inevitable for this type of work. To avoid seepage, use spray adhesive and less paint on your roller and brush.
You can stencil with acrylic or latex paint, stencil creams, fabric paint or glaze. Use a foam roller or stencil brush. We find that it is not necessary to use spray adhesive with stencils, but if you want very crisp edges, please use it (Elmer's spray adhesive seems to be the best). The trick with stenciling is to take care not to over-load your roller or brush with paint and not to press hard on a roller while stenciling. I personally prefer just to use blue painter's tape to secure the stencil, but for beginners I would suggest using spray adhesive to make sure you get great results.
Did you know you can stencil your own fabric and use it for curtains, tablecloths, pillows, etc.? When stenciling on fabric, please use stencil adhesive to ensure good results. First, tape your ironed fabric to the surface so it doesn't move around while you stencil. You'll get better results with stencil brushes, but sometimes roller can work too, depending on your fabric. Add some textile medium ( sold in craft stores) to your acrylic paint. You can also get a specially formulated fabric paint, but, frankly, good craft acrylic paint with a dollop of textile medium mixed in works just as well, and costs way less! :) Let the stenciled image dry completely, 24 hours is best, then heat-set it by ironing the fabric for about 20-30 seconds on a LOW setting through the piece of cloth. Heat-setting will cure the paint and will prevent it from being washed off in the washing machine. Always experiment with a sample of your fabric first to ensure good results. We have stenciled on silk, cotton, linen and even sheer fabrics with great results. It's always better if your fabric doesn't have too much texture.
All of our stencils are made of thick, sturdy but flexible 12 mil clear plastic, reusable, easy to clean and stenciler-friendly! In our 20+ years of professional stenciling this material has proven to be far superior than any other material we used, including the industry standard 8 mil mylar. We are certain you'll notice the difference and will love working with it, just like all the folks who already bought our stencils. Our stencils are made to last and with proper care and storage will serve you for a long time.
Our professional decorative painting company, SpecFin Designs, has been a leader in decorative and faux painting for over 20 years in NYC/NJ Metropolitan area. After many years of painting we finally decided to open a stencil company and start selling our stencils to other artists and craftsmen. You can see many beautiful examples of our stenciled projects by visiting https://www.specfindesigns.com. Please browse our extensive portfolio and feel free to use it for your inspiration!