Free shipping over $100


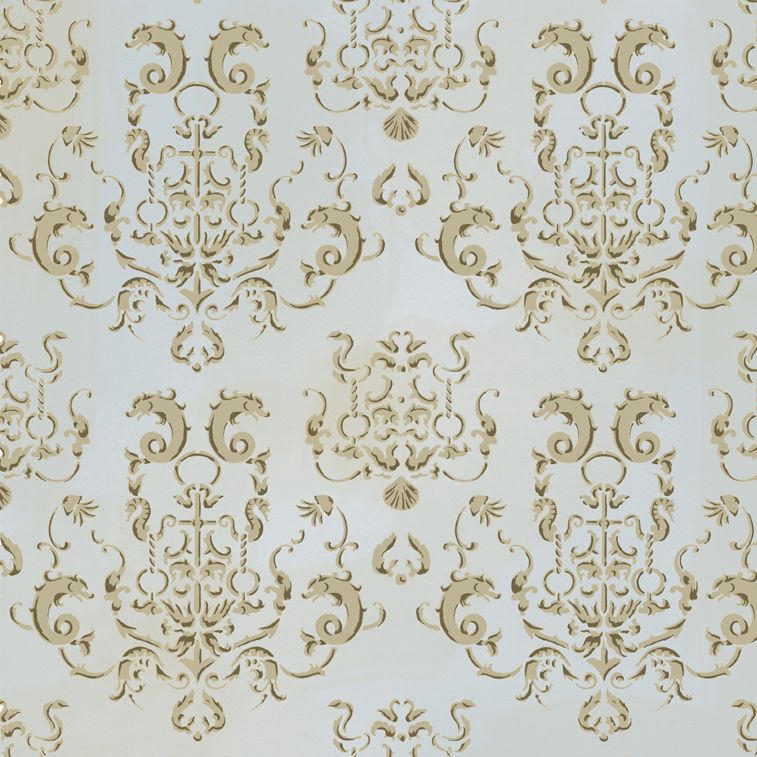
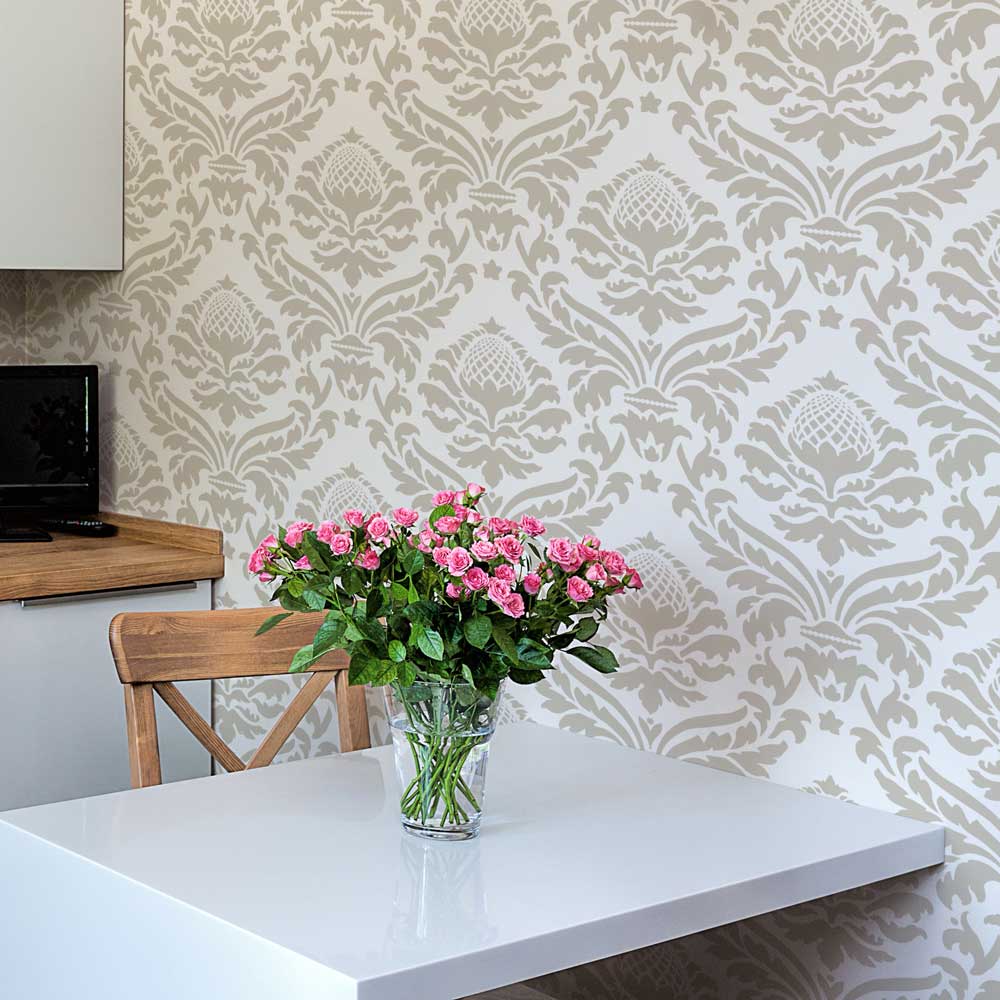
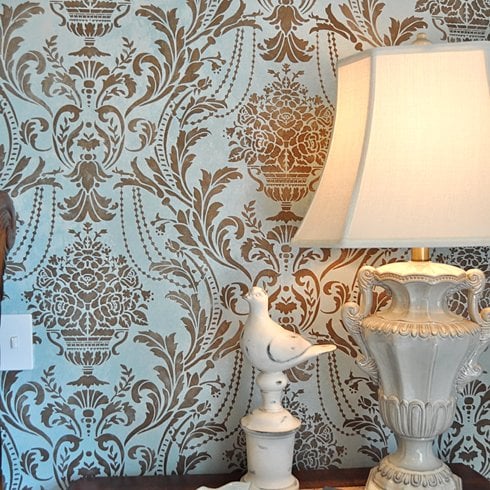
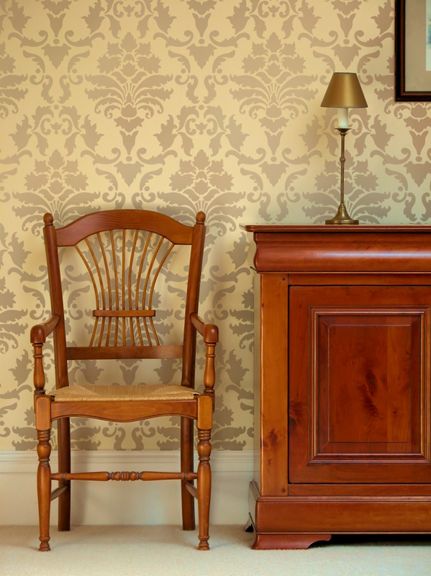
Duchess Damask Stencil
Bought by
+
customers in the past day

Estimated Arrival: 3-5 business days
Highest Quality Stencils
Safe checkout
Made in USA
Free shipping over $100
Highest Quality Stencils
Safe checkout
Made in USA
PRODUCT INFO:
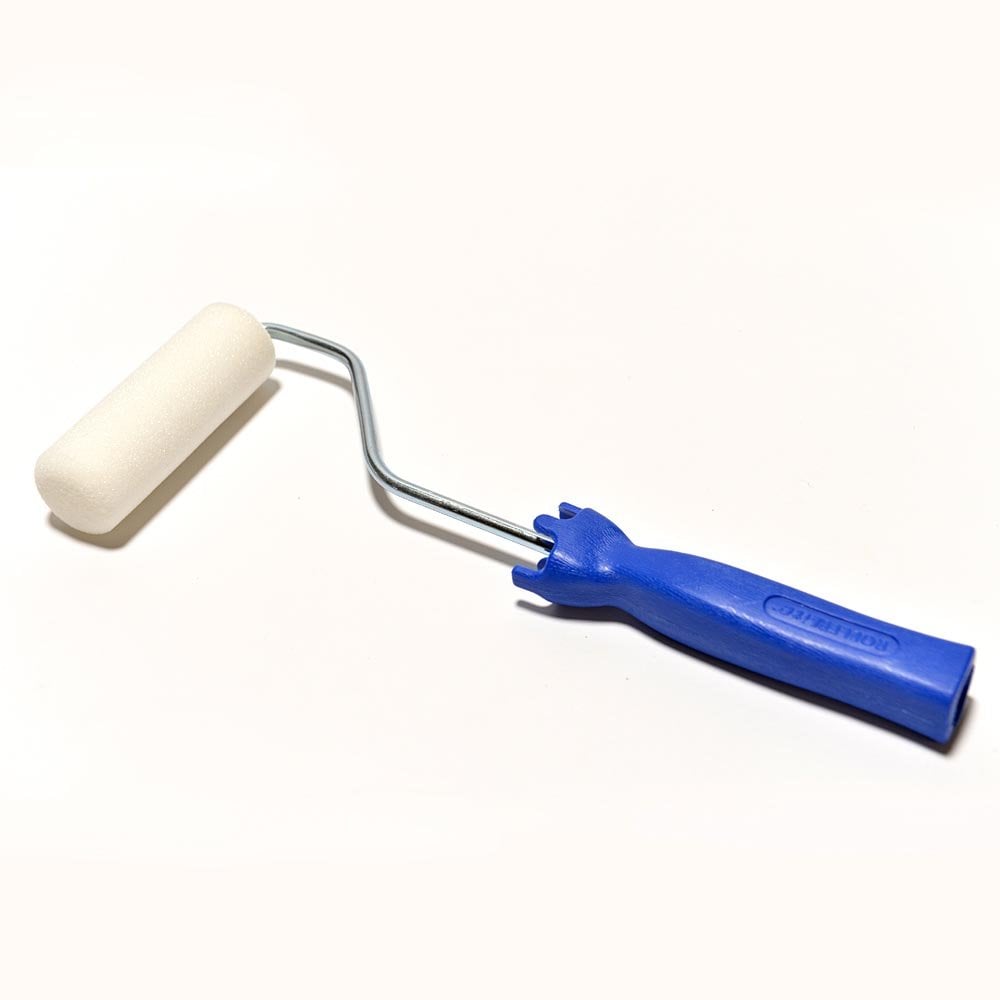
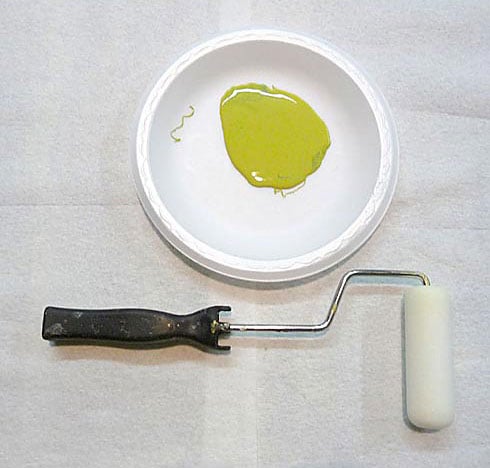
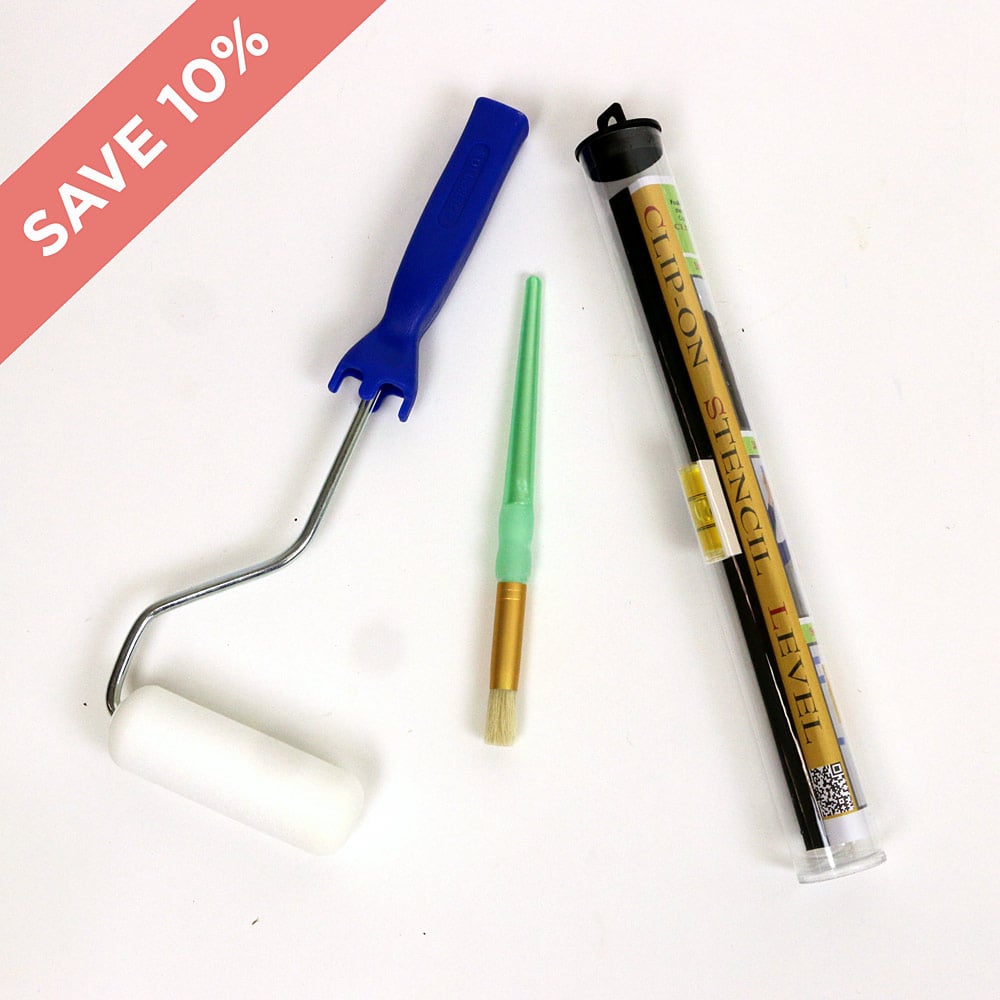
SUPPLIES YOU NEED


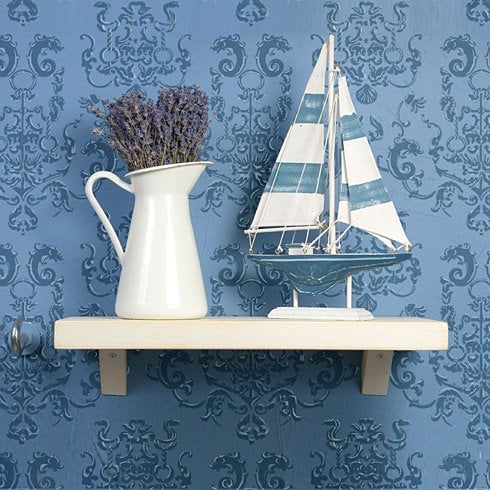
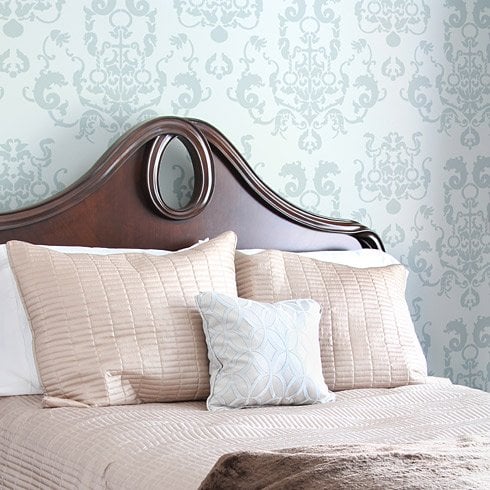
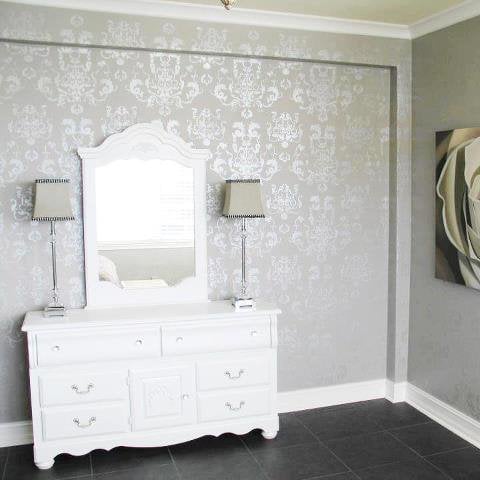
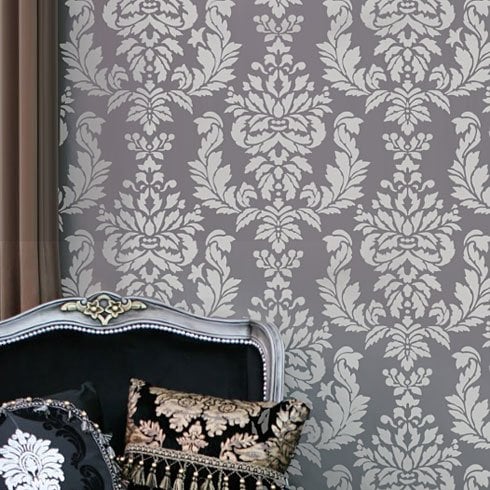
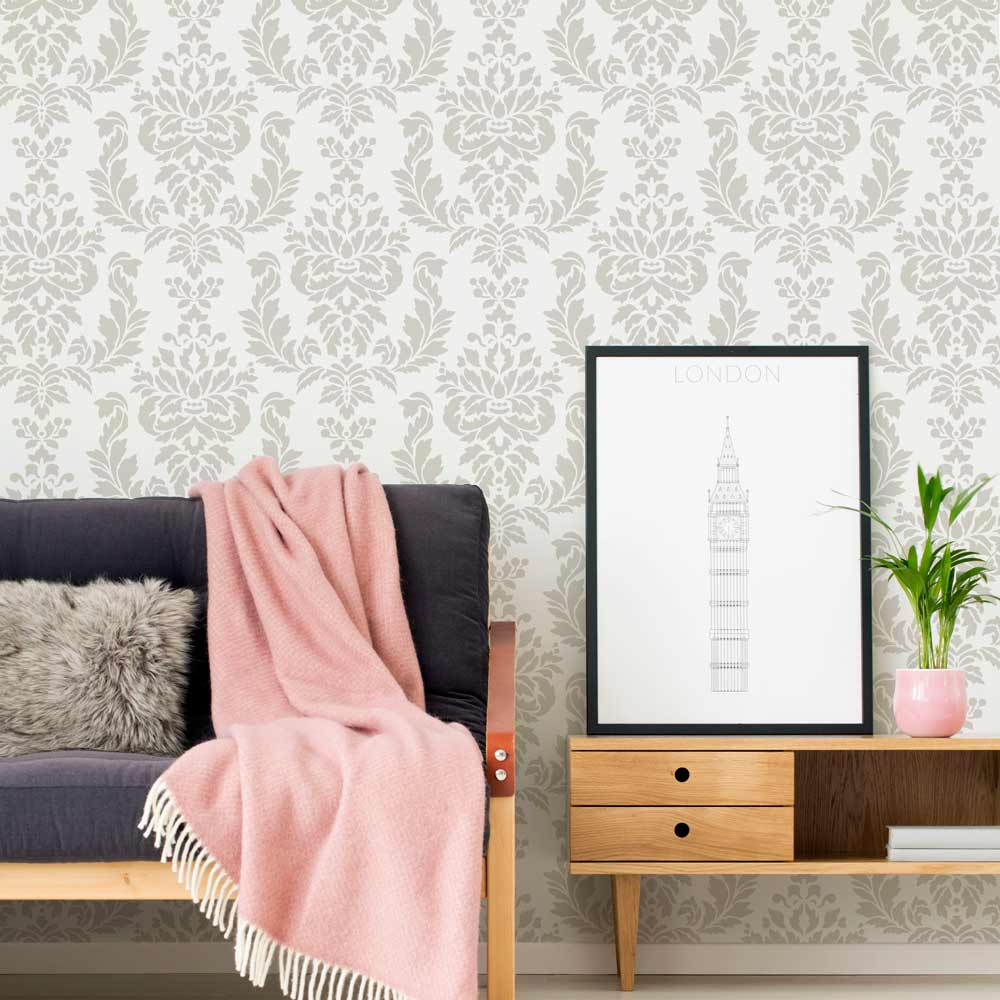
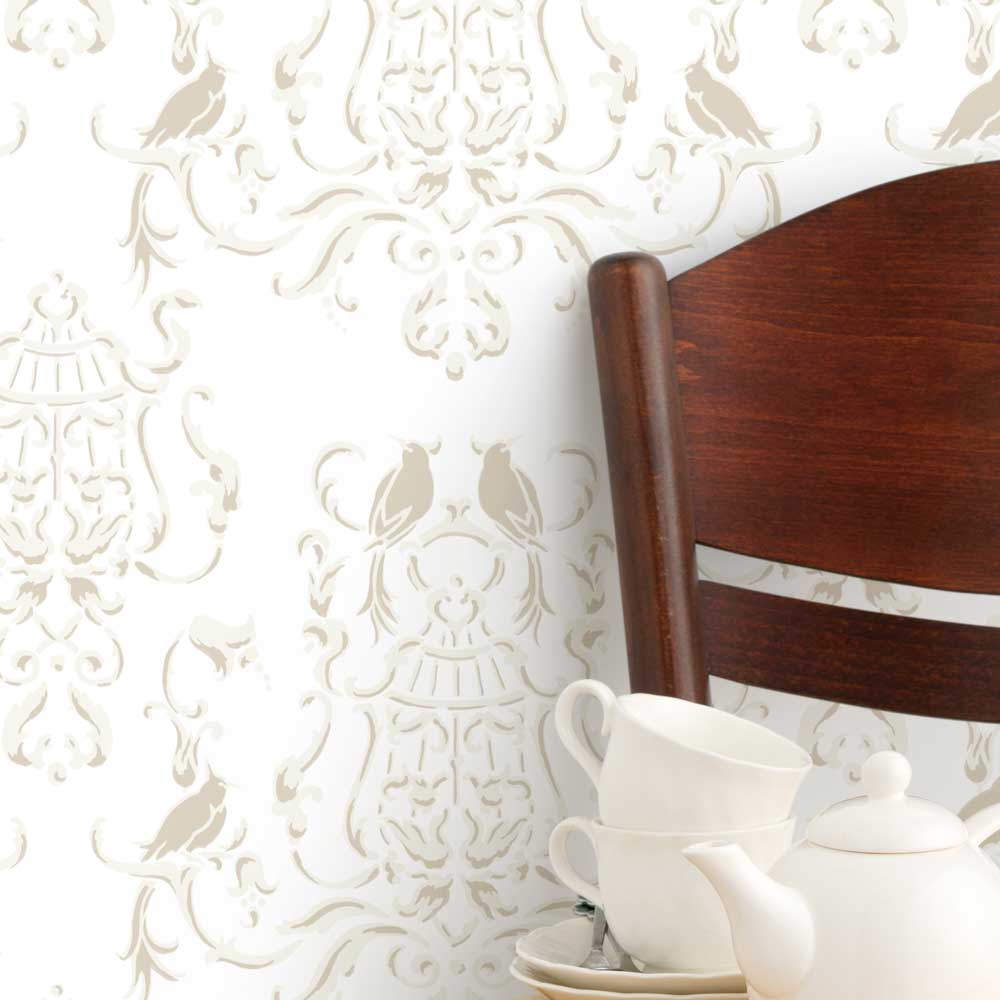
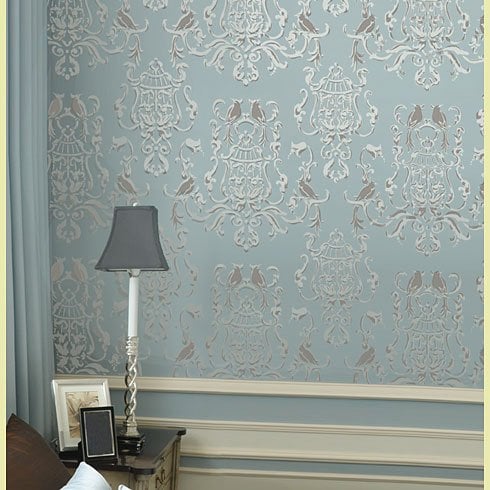
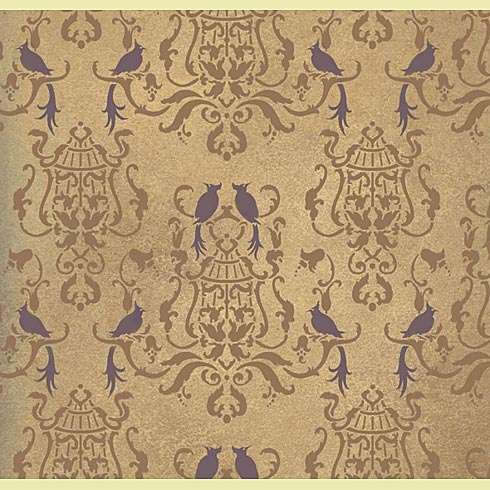
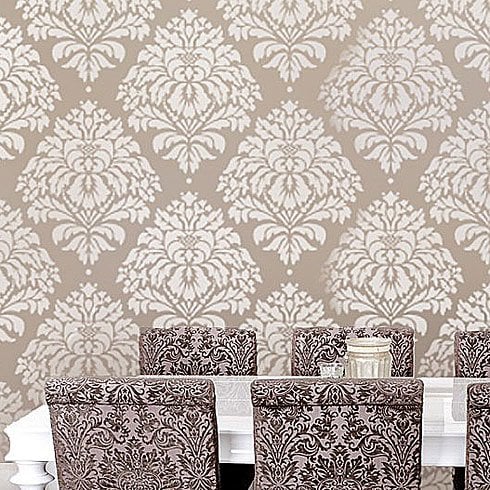
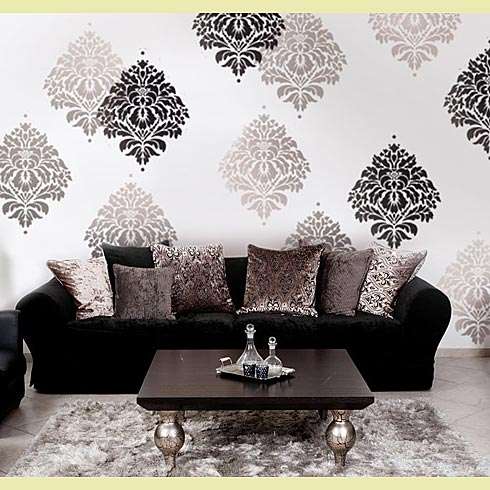
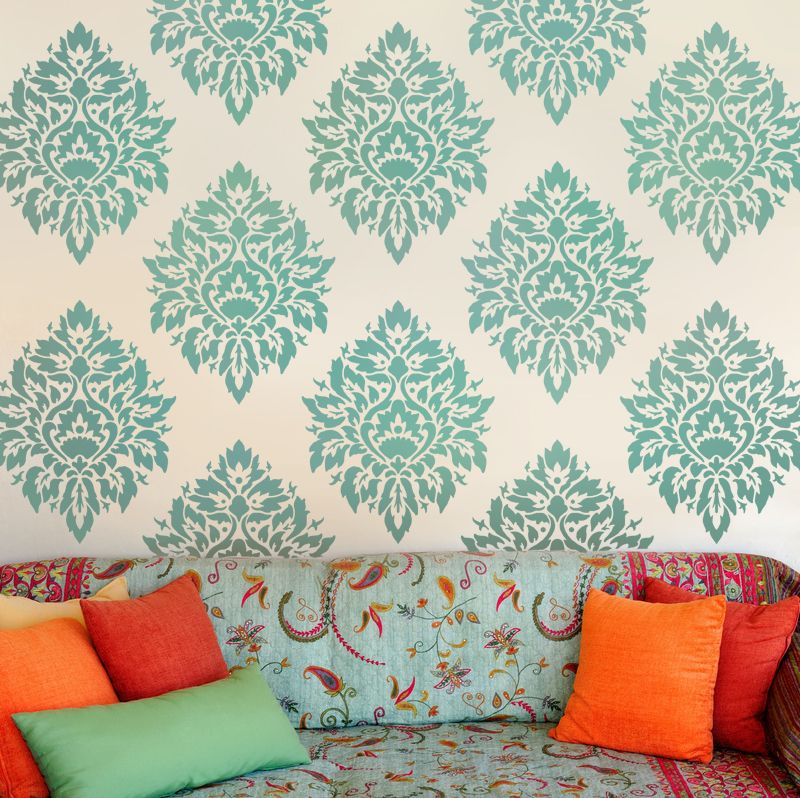
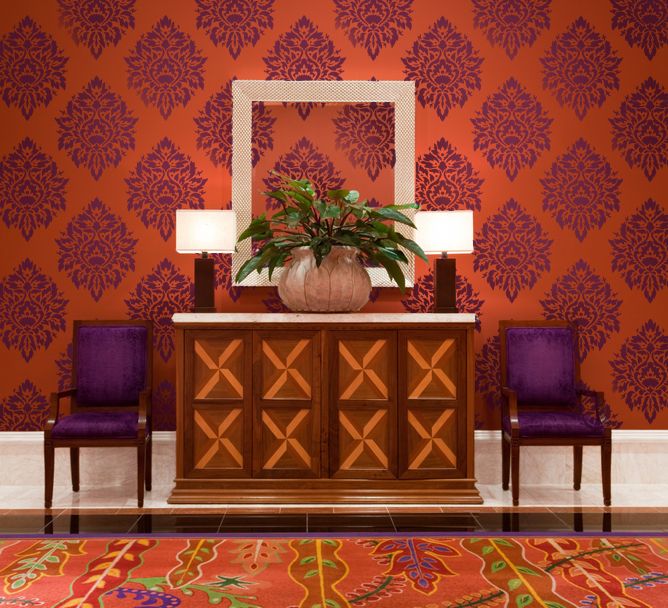
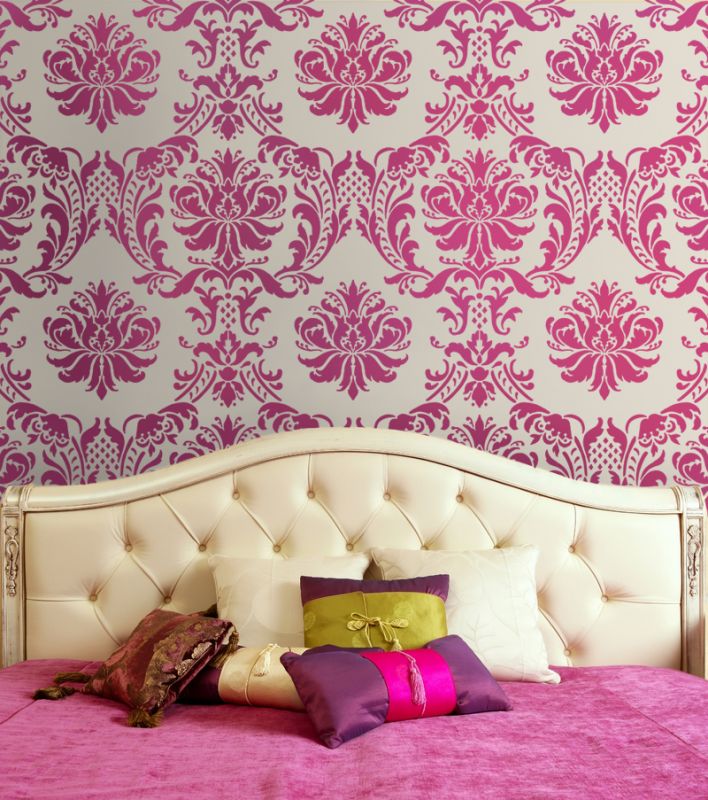
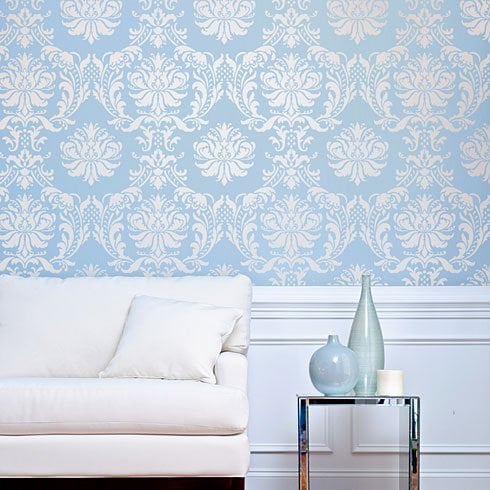
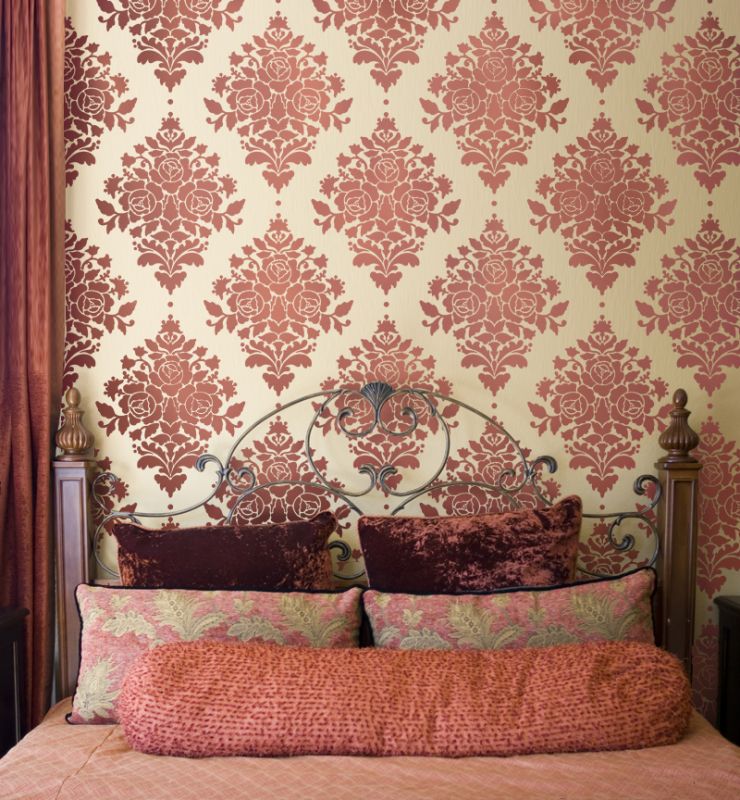
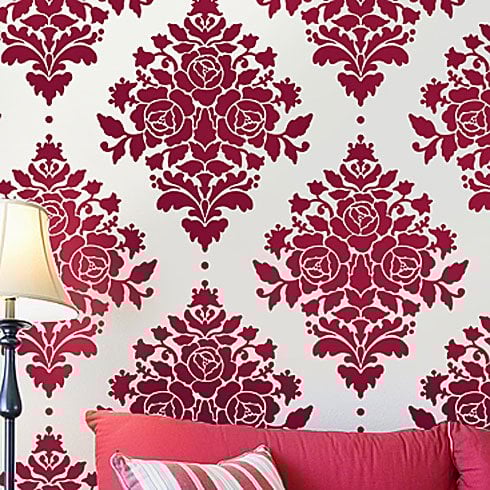
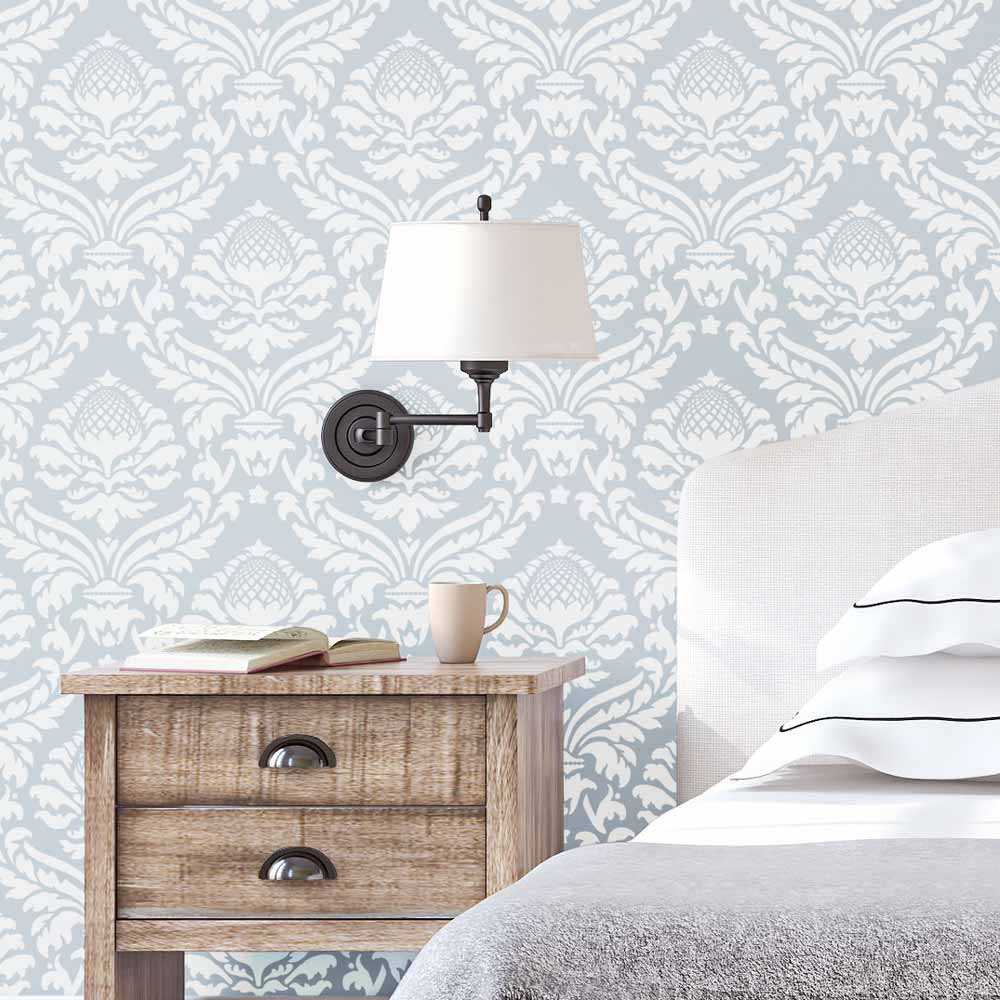
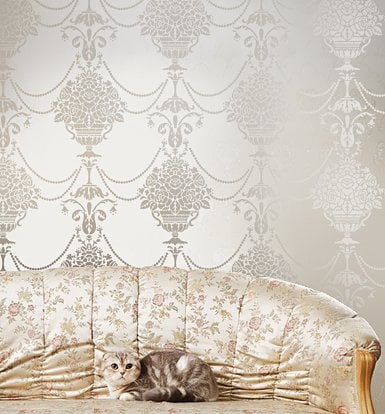
Why use expensive wallpaper when you can simply stencil your walls with this classic Duchess Damask! This classy stencil pattern features vases with flowers and elegant pearls.
Reusable stencils save you money and make you feel proud of your creation. This elegant allover pattern is perfect for DIY decor. Damask stencil patterns bring stylish elegance to any room. Great for classical decor but will work in the contemporary setting too.
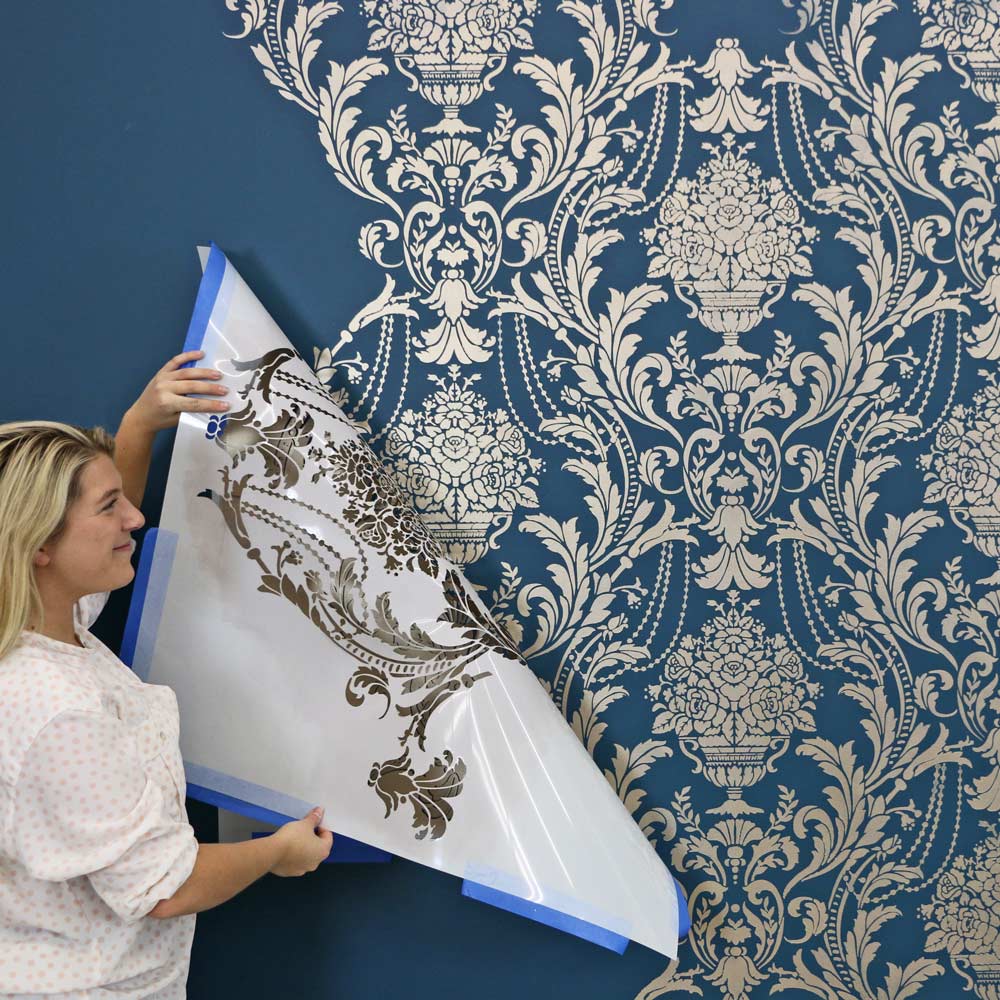
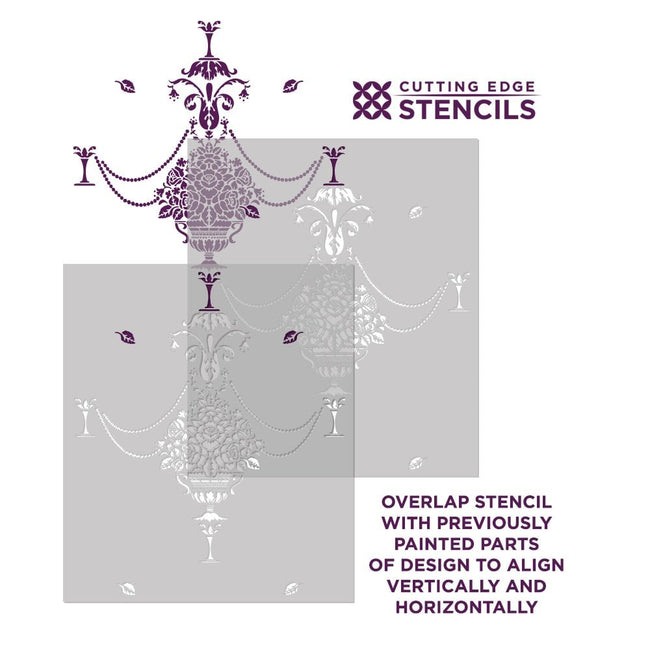
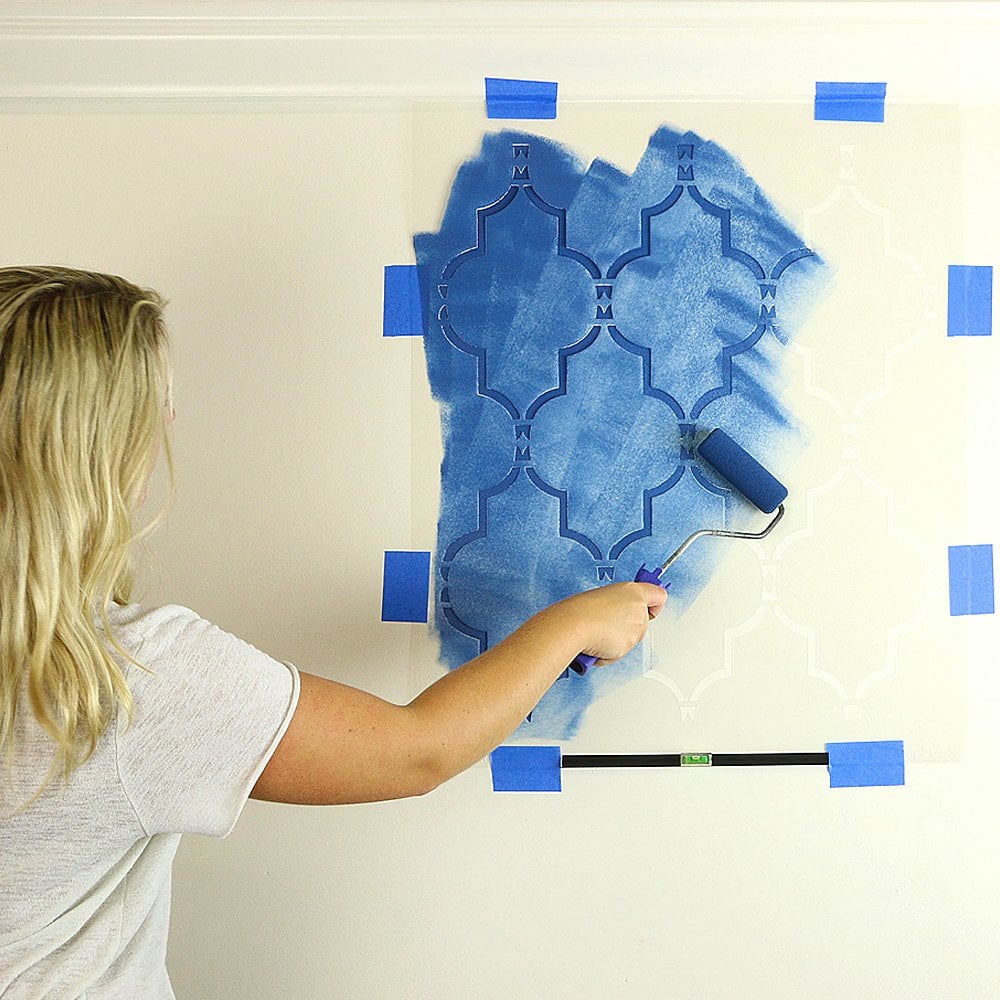
This design will look stunning stenciled on your accent wall or above the chair rail. Easy registration system, simply line up your stencil with the leaf design of previously painted print, check for level and continue. This gives you a seamless "wallpaper" look. While prior stenciling experience is recommended for allover patterns, even beginner stencilers get great results! This design is recommended for feature/accent wall and entire room and also works for furniture and fabric embellishment.
Want to learn how to stencil an interlocking allover pattern? Easier than you think! Here are the detailed illustrated step-by-step Damask/Allover Stenciling Tips.
And make sure you watch our short step-by-step Video Tutorials!
You'll find them extremely helpful for your stenciling project. While prior experience is helpful when working with repeat interlocking stencils, even beginners get great results!
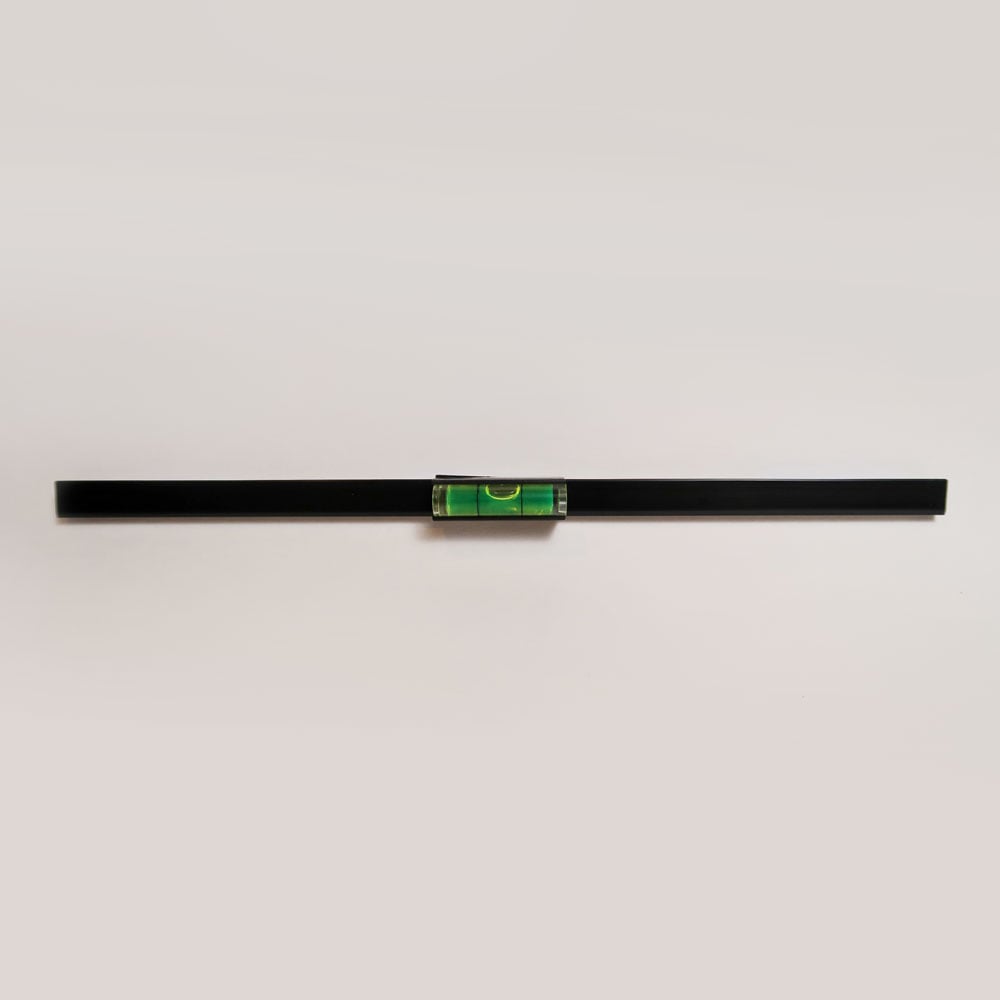
Try this stencil with our new Clip-on Stencil Level, (sold separately) and discover how easy it is to achieve perfectly level results without dealing with all those bulky heavy bubble levels and annoying laser levels.
We find that it is not necessary to use spray adhesive with our stencils, but for this crisp geometric pattern it is recommended. If you want to minimize paint seepage or are using high contrasting colors, adhesive is very helpful (Elmer's spray adhesive seems to be the best). Make sure you shake the can well and lightly mist (not drench) the stencil, and let it dry for a moment before positioning it on the wall. This step will prevent the adhesive residue transferring to the wall. You'll need to re-mist the stencil after a few repeats. Clean-up tip: Spray the stencil with Simple Green to help to remove adhesive residue.
Did you know you can stencil on fabric too? You can create custom stenciled curtains, pillows and table cloths with our stencils! When stenciling on fabric, stencil adhesive is very helpful. First, tape your ironed fabric to the surface so it doesn't move around while you stencil. Use stencil brushes, or roller, and add some textile medium (sold in craft stores) to your acrylic paint. You can also get a special fabric paint, but, frankly, good craft acrylics with a dollop of textile medium work just as well, and costs way less too! :) Let the stenciled image dry completely, 24 hours is best, then heat-set it by ironing the fabric for about 20 seconds (more or less) on a LOW setting through the piece of cloth. Heat-setting will cure the paint and prevent it from being washed off in the washing machine. Always experiment with a sample of your fabric first to ensure good results. I've stenciled on silk, cotton, linen and even sheer fabrics with great results. It's always better if your fabric doesn't have too much texture.
The stencil is made out of durable 12 mil clear plastic stencil material. This material is strong but flexible, reusable and easy to clean. We love it so much more than standard 5-8 mil Mylar! It's not brittle, user friendly and just so easy to work with. In our many years of professional stenciling this material has proven to be far superior to any other stencil material we used. Our customers love it too, and we are sure that you'll notice the difference! Our stencils will last a long time and are a pleasure to use.
- Our stencils are expertly designed by decorative painting professionals Janna Makaeva and Greg Swisher, so when you're buying a stencil from Cutting Edge it's backed by our 20+ years of painting and decorating experience.
- Our Sturdy and Reusable stencils can be used again and again. One stencil can produce many images unlike one-time use vinyl decals. Our stencils are laser cut from top quality 10 mil mylar stencil material which is user-friendly and easy to clean.
- If you compare our stencil thickness, size, design quality, prices and the level of customer support, you will be amazed at the value that Cutting Edge Stencils offers!
- Stencils are super economical! Stenciling is more cost effective than wallpaper, decals or faux finishes. Stencils work on walls, even lightly textured ones, also on floors, ceilings, furniture and fabric You are not limited with your color choices. Choose any paint color you want to perfectly match your decor Stencils will never damage your walls. No peeling, no glue residue, no worries.
- Unlike decals or wallpaper, stenciling is easy to touch-up, adjust or re-do. With most decals you only get one chance to install it right. With wallpaper, the splitting seams and messy removal together with high cost makes it a less attractive option.
- We ship our stencils fast using USPS Priority Mail and also offer Expedited shipping options and International shipping at very competitive rates.
- Our large stencil collection is constantly growing reflecting the most current decorating trends, so you have plenty of modern stencil designs to choose from.
- We offer custom scaling of our designs up or down to accommodate your specific project.
- Our customer service is the best and the friendliest! We are here for you to answer your questions, to help you place an order, and to solve any possible issues.
- Cutting Edge Stencils is an established leading brand with a huge social following, actively present on all major social platforms. We offer the best in the industry video tutorials and expert stenciling instructions.
USPS can deliver most domestic packages within 3-5 business days (often sooner). For international packages, the delivery time is appr. 7-14 days. For Expedited shipping please select the options at the Checkout. Allow 1 business day for processing of all expedited orders.
30-DAY RETURNS
You can return your unused items within 30 days with no restocking fee. Questions? Please see our full Shipping and Returns Policy.
If you require custom size stencils, please contact us.
Choose options
Estimated Arrival: 3-5 business days
Free shipping over $100
Highest Quality Stencils
Safe checkout
Made in USA
Free shipping over $100
Highest Quality Stencils
Safe checkout
Made in USA
PRODUCT INFO:
SUPPLIES YOU NEED
Why use expensive wallpaper when you can simply stencil your walls with this classic Duchess Damask! This classy stencil pattern features vases with flowers and elegant pearls.
Reusable stencils save you money and make you feel proud of your creation. This elegant allover pattern is perfect for DIY decor. Damask stencil patterns bring stylish elegance to any room. Great for classical decor but will work in the contemporary setting too.
This design will look stunning stenciled on your accent wall or above the chair rail. Easy registration system, simply line up your stencil with the leaf design of previously painted print, check for level and continue. This gives you a seamless "wallpaper" look. While prior stenciling experience is recommended for allover patterns, even beginner stencilers get great results! This design is recommended for feature/accent wall and entire room and also works for furniture and fabric embellishment.
Want to learn how to stencil an interlocking allover pattern? Easier than you think! Here are the detailed illustrated step-by-step Damask/Allover Stenciling Tips.
And make sure you watch our short step-by-step Video Tutorials!
You'll find them extremely helpful for your stenciling project. While prior experience is helpful when working with repeat interlocking stencils, even beginners get great results!
Try this stencil with our new Clip-on Stencil Level, (sold separately) and discover how easy it is to achieve perfectly level results without dealing with all those bulky heavy bubble levels and annoying laser levels.
We find that it is not necessary to use spray adhesive with our stencils, but for this crisp geometric pattern it is recommended. If you want to minimize paint seepage or are using high contrasting colors, adhesive is very helpful (Elmer's spray adhesive seems to be the best). Make sure you shake the can well and lightly mist (not drench) the stencil, and let it dry for a moment before positioning it on the wall. This step will prevent the adhesive residue transferring to the wall. You'll need to re-mist the stencil after a few repeats. Clean-up tip: Spray the stencil with Simple Green to help to remove adhesive residue.
Did you know you can stencil on fabric too? You can create custom stenciled curtains, pillows and table cloths with our stencils! When stenciling on fabric, stencil adhesive is very helpful. First, tape your ironed fabric to the surface so it doesn't move around while you stencil. Use stencil brushes, or roller, and add some textile medium (sold in craft stores) to your acrylic paint. You can also get a special fabric paint, but, frankly, good craft acrylics with a dollop of textile medium work just as well, and costs way less too! :) Let the stenciled image dry completely, 24 hours is best, then heat-set it by ironing the fabric for about 20 seconds (more or less) on a LOW setting through the piece of cloth. Heat-setting will cure the paint and prevent it from being washed off in the washing machine. Always experiment with a sample of your fabric first to ensure good results. I've stenciled on silk, cotton, linen and even sheer fabrics with great results. It's always better if your fabric doesn't have too much texture.
The stencil is made out of durable 12 mil clear plastic stencil material. This material is strong but flexible, reusable and easy to clean. We love it so much more than standard 5-8 mil Mylar! It's not brittle, user friendly and just so easy to work with. In our many years of professional stenciling this material has proven to be far superior to any other stencil material we used. Our customers love it too, and we are sure that you'll notice the difference! Our stencils will last a long time and are a pleasure to use.
- Our stencils are expertly designed by decorative painting professionals Janna Makaeva and Greg Swisher, so when you're buying a stencil from Cutting Edge it's backed by our 20+ years of painting and decorating experience.
- Our Sturdy and Reusable stencils can be used again and again. One stencil can produce many images unlike one-time use vinyl decals. Our stencils are laser cut from top quality 10 mil mylar stencil material which is user-friendly and easy to clean.
- If you compare our stencil thickness, size, design quality, prices and the level of customer support, you will be amazed at the value that Cutting Edge Stencils offers!
- Stencils are super economical! Stenciling is more cost effective than wallpaper, decals or faux finishes. Stencils work on walls, even lightly textured ones, also on floors, ceilings, furniture and fabric You are not limited with your color choices. Choose any paint color you want to perfectly match your decor Stencils will never damage your walls. No peeling, no glue residue, no worries.
- Unlike decals or wallpaper, stenciling is easy to touch-up, adjust or re-do. With most decals you only get one chance to install it right. With wallpaper, the splitting seams and messy removal together with high cost makes it a less attractive option.
- We ship our stencils fast using USPS Priority Mail and also offer Expedited shipping options and International shipping at very competitive rates.
- Our large stencil collection is constantly growing reflecting the most current decorating trends, so you have plenty of modern stencil designs to choose from.
- We offer custom scaling of our designs up or down to accommodate your specific project.
- Our customer service is the best and the friendliest! We are here for you to answer your questions, to help you place an order, and to solve any possible issues.
- Cutting Edge Stencils is an established leading brand with a huge social following, actively present on all major social platforms. We offer the best in the industry video tutorials and expert stenciling instructions.
USPS can deliver most domestic packages within 3-5 business days (often sooner). For international packages, the delivery time is appr. 7-14 days. For Expedited shipping please select the options at the Checkout. Allow 1 business day for processing of all expedited orders.
30-DAY RETURNS
You can return your unused items within 30 days with no restocking fee. Questions? Please see our full Shipping and Returns Policy.
If you require custom size stencils, please contact us.